10ML-II Bedding Job -- A Pictorial History

Modern Muzzleloading Forum

Help Support Modern Muzzleloading Forum:

This site may earn a commission from merchant affiliate links, including eBay, Amazon, and others.

HokieHunter

Well-Known Member
*
Joined
Nov 22, 2005
Messages
195
Reaction score
0
I finally wrapped up the bedding job on the new 10ML-II laminate. I documented every step with photos, as I thought some of you may be interested. It's my second bedding job, and, frankly, neither one has been that difficult. I'm no pro, but we'll see how she shoots!

I'll post the most useful photos with explanations as replies to this message -- all in this thread. Let me know if you have any questions, and I'd love to hear your critiques; I'm always looking to learn something new.
 
Working Area

WorkArea.jpg


Here's my working area. I used my Caldwell lead sled as a working platform for the stock, and it made all the difference in the world. I elected to go with Marine-Tex Grey as the bedding compound. It's widely used for this purpose, and you can find it at any marine store.
 
Step #1

BondingHoles.jpg


I tried to remove about 1/16" from the entire receiver channel, from the recoil lug recess back to the rear pillar. There is no way that I can see that you could bed aft of the rear pillar on this gun, and I'm not sure what good it would do anyway. After removing the wood with coarse sandpaper and a dremel, I drilled holes about 1/8" deep everywhere bedding compound was going to go.

Actually, I needed to remove a little more wood than I did, as I only got about 1/32" out in some places. Near the rear pillar, I left a little too much wood, so the bedding compound is a little thin back there. I don't think it's going to make any difference, however.

I also took this opportunity to remove wood from the barrel channel to properly float the barrel, as it was definitely NOT floated from the factory. This was a little painstaking, but I'm sure it will be well worth the effort.
 
Step #2

ClayatTang.jpg


Here I used modeling clay (Brownells) to dam up the trigger group recess to prevent epoxy from making it's way down into the recess. This is a little like making a sculpture, and it may seem a little silly, but the effort is worth it. If you skip this step, you'll spend hours grinding away at the seepage and spillover.
 
Step #3

ClayatLug.jpg


Same thing for the barrel channel. I like a neat finished appearance, so I wanted a definitive stopping point for the epoxy just forward of the lug recess. You really have to think about where the epoxy is going to go; in this case, I needed to ensure that the ramrod would still seat fully rearward.
 
Step #4

SettingUp.jpg


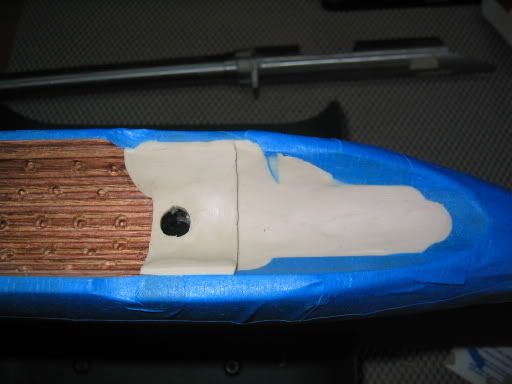
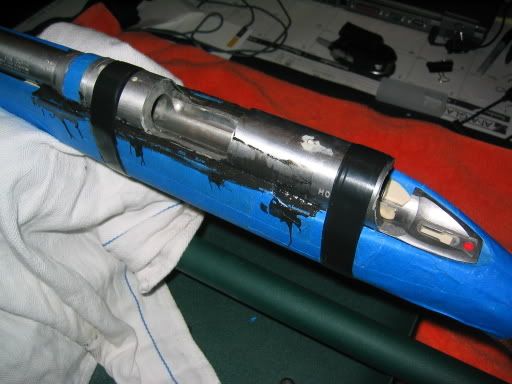
I didn't get a picture of me adding the epoxy, as it was a freaking mess, and I didn't want to touch my digital camera. Everything was taped carefully with blue 3M painters tape (low adhesive...won't harm stock finish) and trimmed with an exacto knife. This is so critical, as you want the edges of the bedding job to be neat and crisp. After taping, I applied release agent to the tape and, of course, every square millimeter of the receiver. I removed the trigger group altogether, and I'd recommend you do the same!

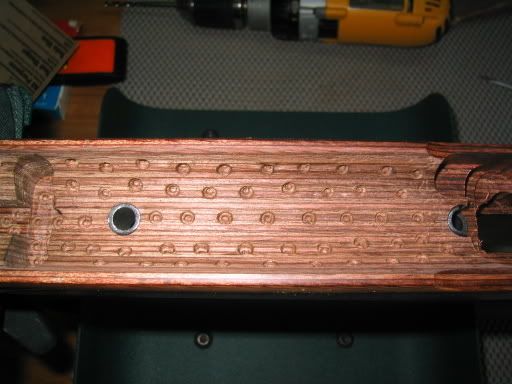
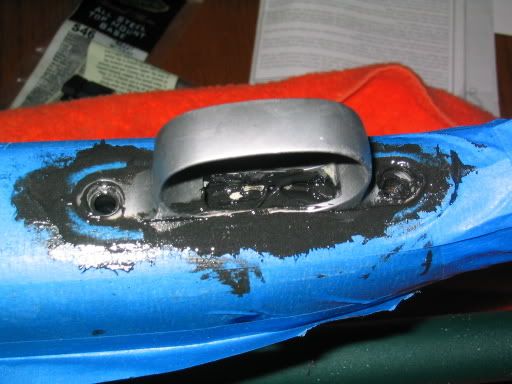
I started with 3" x 1/4" x 28 bolts with the heads cut off as guides to sink the receiver and barrel back into the epoxy. These settled into the pillars nicely without pushing much epoxy into the pillar holes. This is one nice thing about Marine-Tex Grey; it's so thick, that it's like working with paste, and you can keep it away from the pillar holes until you sink the receiver. Once it was down into the stock, I switched to the original receiver bolts (covered liberally with release agent) to snug the receiver down. I used less than full torque to snug it down (maybe 60%). I don't have a torque wrench, so I just guessed. The tighter you crank it down, the more bedding compound will seep out and the thinner the final bed. I'm happy with how this approach worked out.

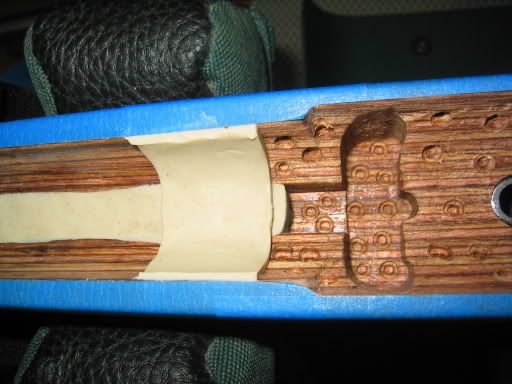
The black electrical tape was applied prior to snugging down the bolts and, in retrospect, was completely unnecessary. Make sure you jam modeling clay into every hole that exists, or you're bound to have some epoxy make it's way in.

For release agent, I used paste furniture wax. Some use Pam spray. Johnson's furniture wax is popular. I swear you could use anything greasy...Crisco would probably work, but I'd recommend sticking to something that has been tried and true. I used a small acid brush to get the wax into all of the little crevices in which I didn't want epoxy setting up.

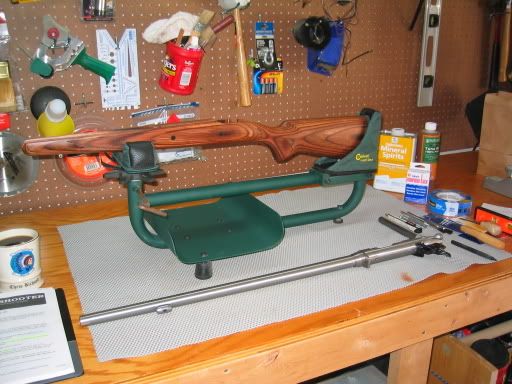
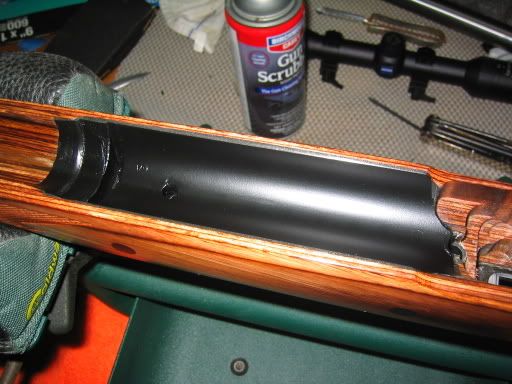
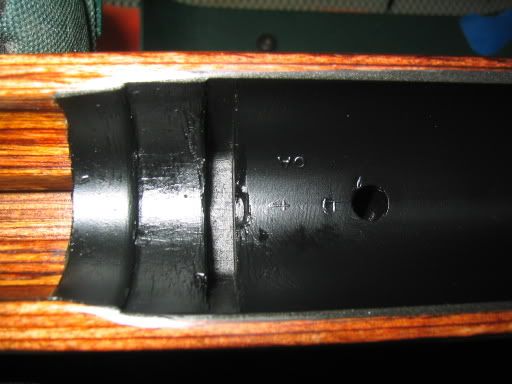
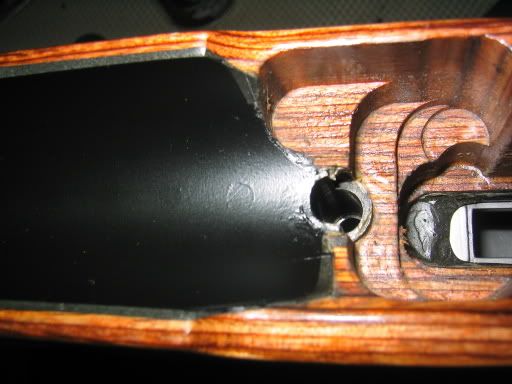
I let it sit 24 hours before removing the barrel, and it was no problem to get it out. I'd wait another 2-3 days before even attempting to shoot it. Don't sand too soon, as epoxy that is only partially set up will flake off in chunks rather than coming off smoothly with sandpaper. I'd wait at least 48 hours prior to sanding.
 
Step #5

SettingUp--TriggerGuard.jpg


I also bedded the trigger guard. Whether or not this will make a difference, who is to say. There is no play whatsoever in any component in the entire receiver group and it's fasterners.
 
Good report, thanks for sharing. Let us know your shooting results also, once get a chance to shoot. :yeah:
 
Step #6

Final1.jpg


After all of the cleanup (and it's a LOT), you'll have to lightly sand the top of the stock at the bedding/wood interface. Otherwise, the transition won't be smooth and attractive. This will leave you with bare wood, which you just seal with tung oil. I used Waterlox Original Sealer/Finish and was very happy with the results. Since I took some wood out of the barrel channel, I also sealed that area. You don't want to leave any unsealed wood grain, or humidity will do a number on it over time. I used two coats of the sealer. More may be better, but I was getting impatient.

The last step, and most important insofar as appearance is concerned, is to go back over the bedding job with flat back spray paint (I use the high temp stuff for grills). I've never heard of anyone else doing this, but you'll wind up with some modeling clay embedded into your epoxy and some discoloration here and there, and the flat black paint makes everything look flawless. Of course, this will mean you'll have to very carefully tape the entire stock again. I consider this to be my signature move!! 8)
 
Close-Ups

Final3.jpg

Final2.jpg


Here you can see the lug recess and tang recess up close. Some of the imperfections are more apparent, but everything is ROCK solid. Where the barrel nut sits you can see the impression of the blue tape. You need to tape the barrel nut to prevent epoxy from forming a mechanical lock around the barrel-nut slots. Also tape the sides and front, NOT the rear, of the recoil lug. This will give you some clearance for removal but still allows the lug to contact the bedding perfectly in the rear -- which is where the magic happens.
 
Final Product

IMG_0116.jpg


And here she is. Fully bedded, complete with Weaver Grand Slam bases (front extension), Warne QR Medium rings, Zeiss Conquest 3.5-10x44, and Brownells Latigo sling. It's time to stop tinkering and start burning powder!
 
I also agree, and add that since you did it yourself you will get added satisfaction in your excellent bedding job/set-up. Simms pad, if not already installed, would be an excellent addition.
 
Beautiful job HokieHunter. Nice report and excellent documentation. Thanks for taking the time to post that. :yeah:
 
That looks like a GREAT job to me Hokie! Looks just GREAT! No way could I go as good as you did!


Are you planning a before/after accuracy story? 8)
 
HokieHunter said:
A before/after would be difficult, as I haven't shot it yet!

Wow, you are patient man. 8)

My problem is the opposite, I shoot when shouldn't. Cold and windy days.
 

Latest posts

Back
Top