Build in progress
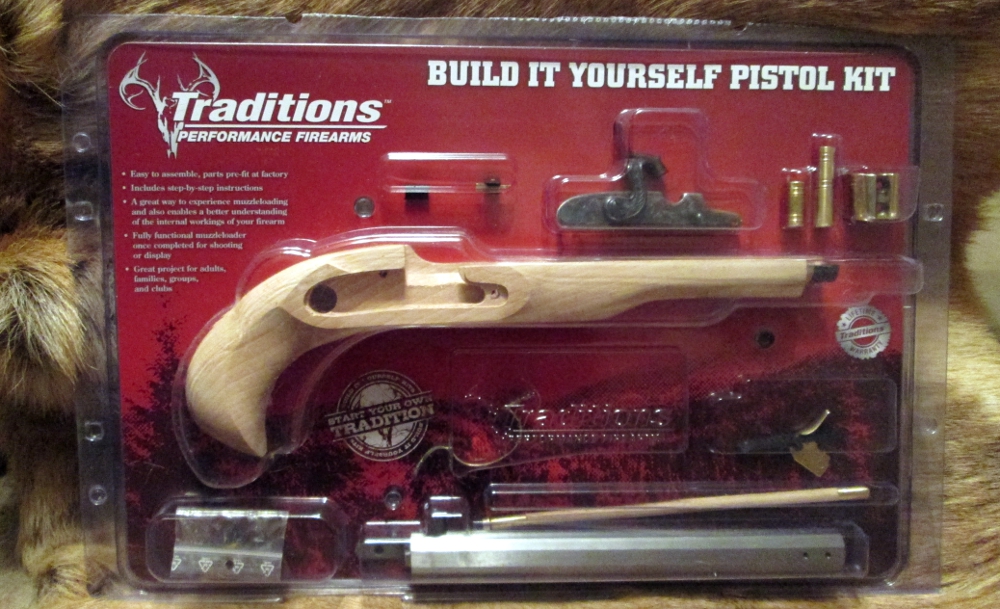
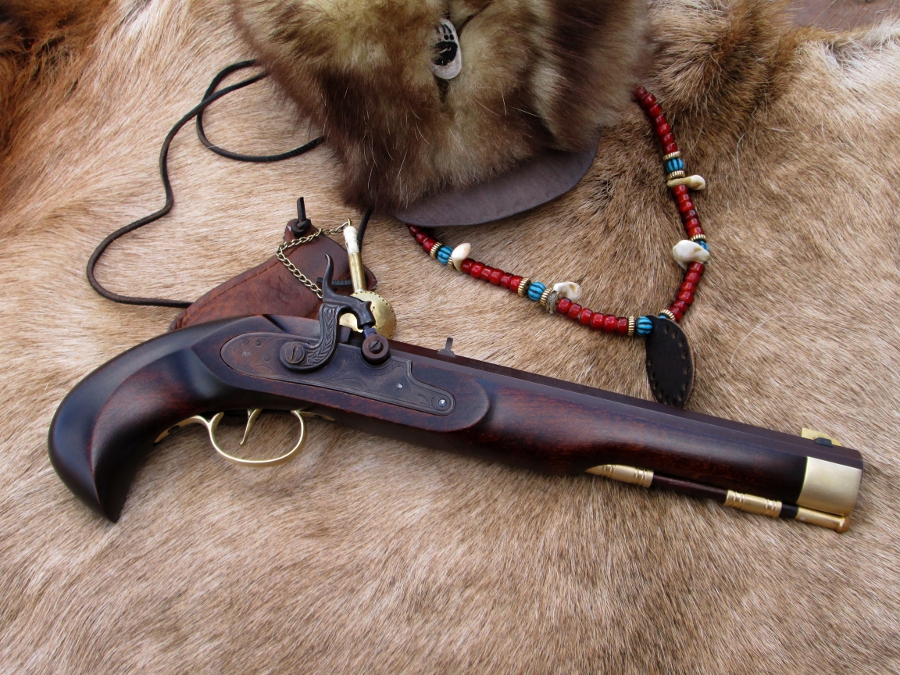
Well, You all know I've been wanting a black powder pistol. It was either the Kentucky or the Trapper pistol kit. I decided on the Kentucky as its a little more slender, easier on your hip when I tuck it under my belt.

I got it in on but was out of state at the time, so yesterday I finally opened the box and tore into it, looking everything over. Very simply straight forward kit! Great looking wood grain, which sadly, most likely will be covered due to the darker stain I will be using so it matches my St.Louis Hawken kit rifle I built a little while back.
Now just some factory provided info:
KPC50602
The Traditions Kentucky<img class="emojione" alt="™" title=":tm:" src="https://cdn.jsdelivr.net/emojione/assets/png/2122.png?v=2.2.7"/> pistol features a bird's head grip, engraved lock plate, fixed sight, case colored sidelock and brass ramrod thimbles. This pistol will please both collector and novice alike. Whether you are a diehard shooter or just a weekend enthusiast, the Traditions<img class="emojione" alt="™" title=":tm:" src="https://cdn.jsdelivr.net/emojione/assets/png/2122.png?v=2.2.7"/> Kentucky pistol will meet all your needs.
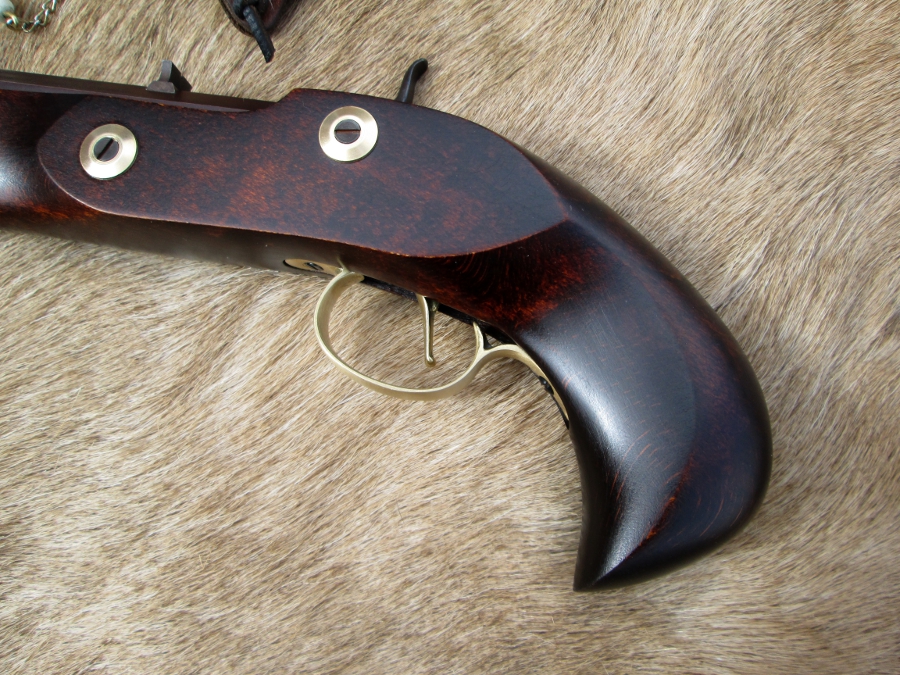
Now Just a heads up! If you have large hands like I do, the birds head grip feels a little short. Its a nice chunk of wood to get a good grip on, but just a little short and odd feeling until you get used to it. If I planned on using this as a target pistol, I'd opt for the Traditions Trapper which has a much longer style stock. However, if you have short stubby hands, the Kentucky is best suited for you.
.50 Caliber - 10" Octagon Barrel - 1:20" Twist
Single Trigger - Brass trigger guard - Fixed Blade sights - Wood Ramrod
Weight: 2lbs 6oz - 15" overall length
Available in both Flintlock & Percussion
The Lock also has an adjustable tumbler so you can make the trigger pull lighter. Mine feels right around 3.5lbs which feels pretty good right now.
I bought mine from Muzzle-Loaders.com for $199 + shipping and it came Fedex in 3 days.
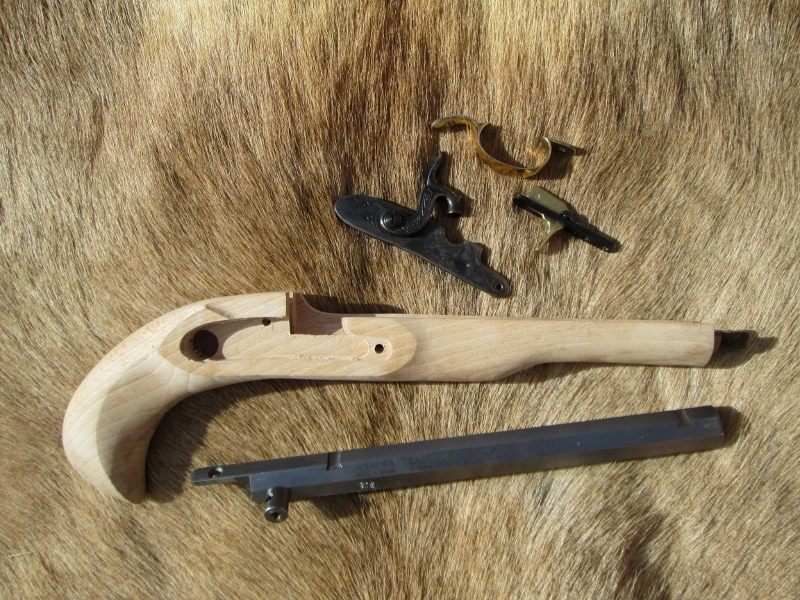
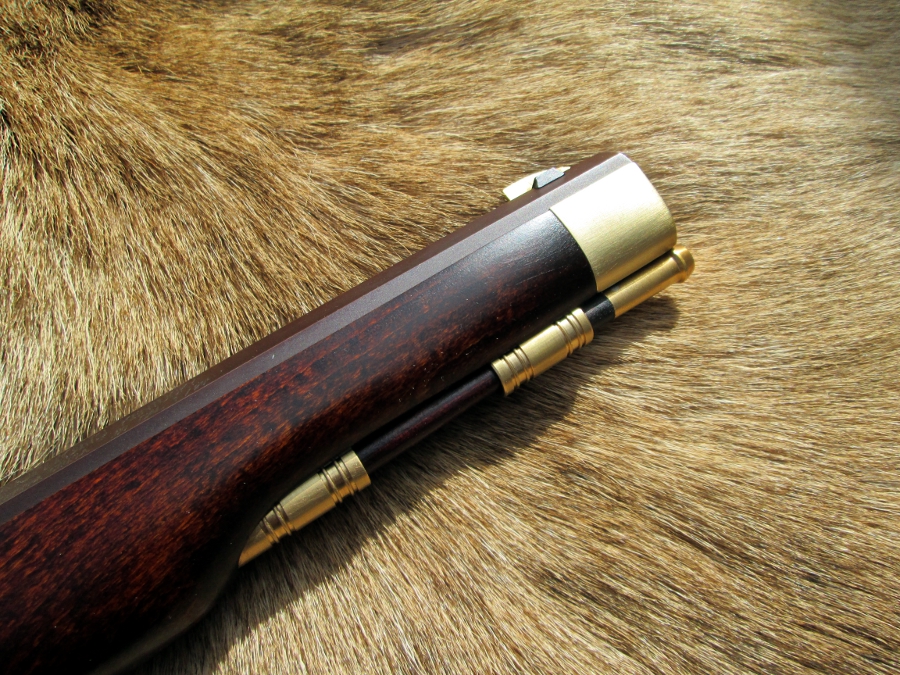
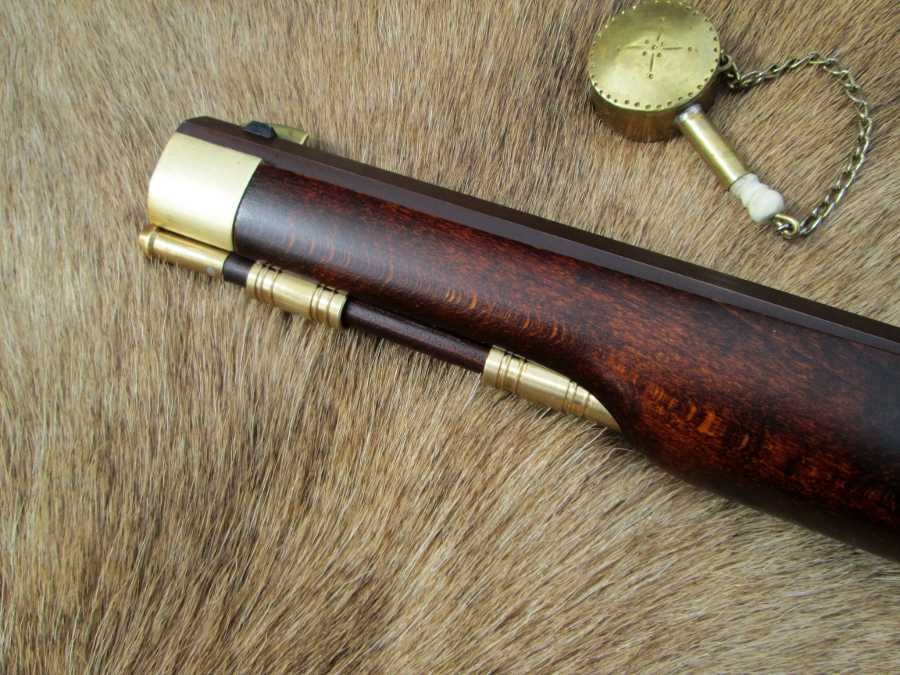
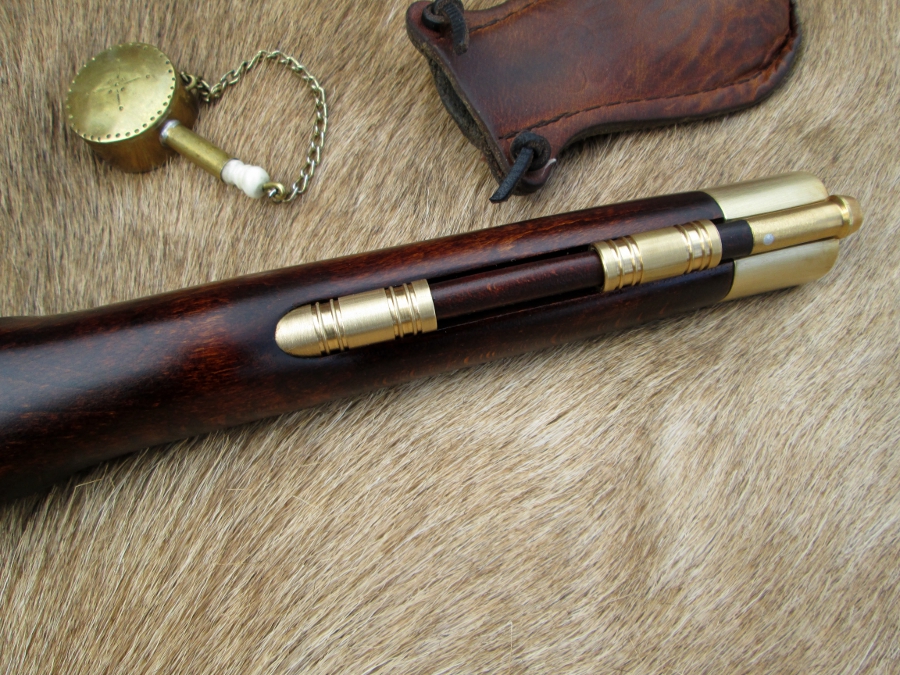
As always, Traditions used Beechwood for the Stock and Ramrod. The ramrod seems very sturdy on this pistol. No cracks or chips were seen, so I started by fitting the nose cap which took longer than expected.
This is my first pistol kit, so some slight errors were made and I will show them. Luckily I caught a couple of them before I did any more damage!
So, Fitting the nose cap took me aprox 25 minutes of slow file and sand paper work. I took a little to much off on one side, so now the nose cap sits above the wood. I will fix this minor issue with an epoxy bedding to even the nose cap with the wood.
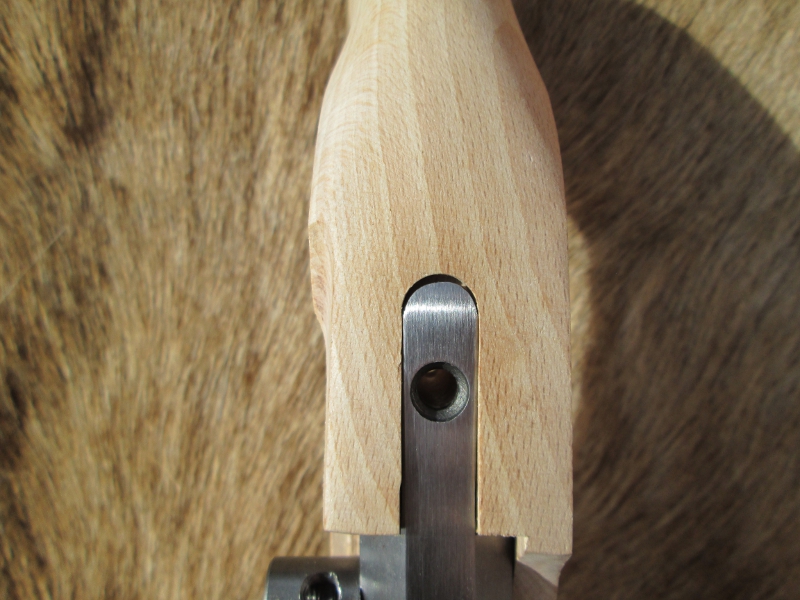
Also, The nose cap sat just a slight touch forward of the holes in the barrel. The screws wanted to go in crooked and you know what that means! Yes, you could strip out the screws if you forced it.
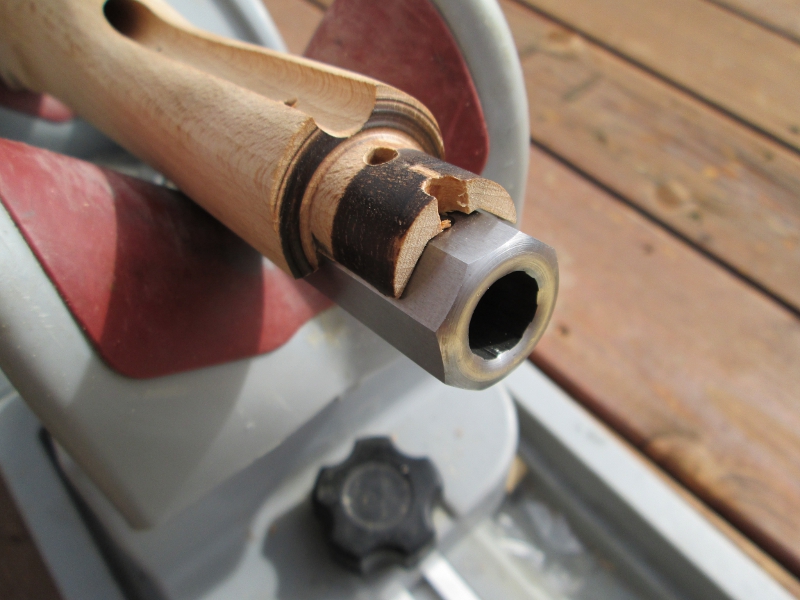
A good deal of wood will need to be removed for a perfect flush fit of brass & wood.
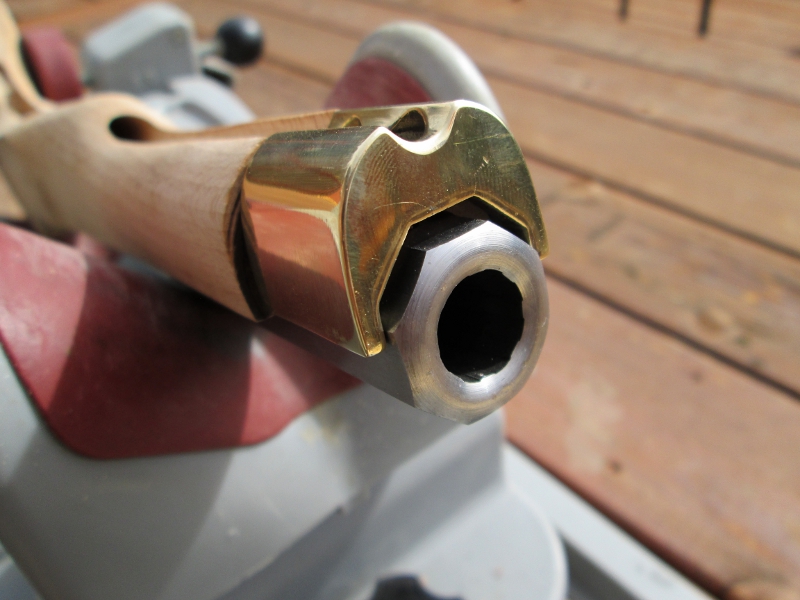
I corrected this by taking the nose cap into the shop and used a 13/64" drill bit and enlarged the holes a bit, then used a small round file to enlarge the holes in the wood stock. This did the job perfectly and only cost me a few minutes of my time.
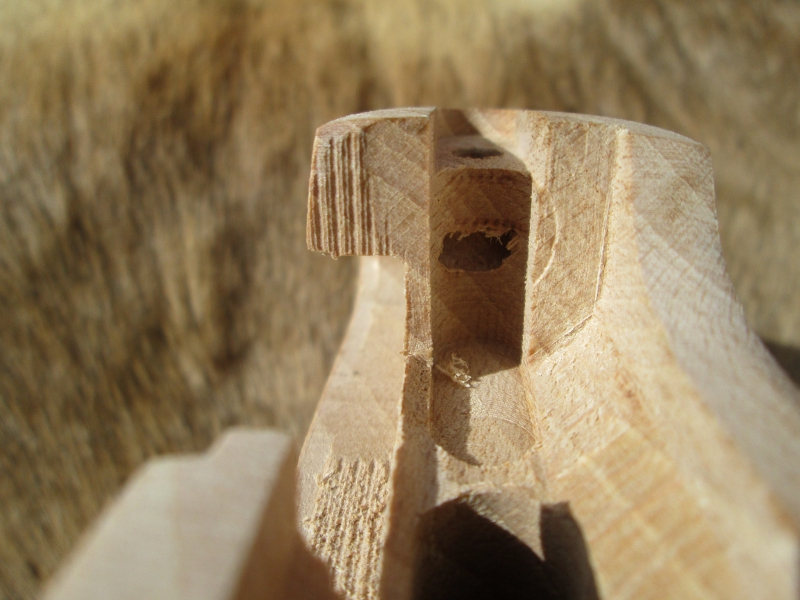
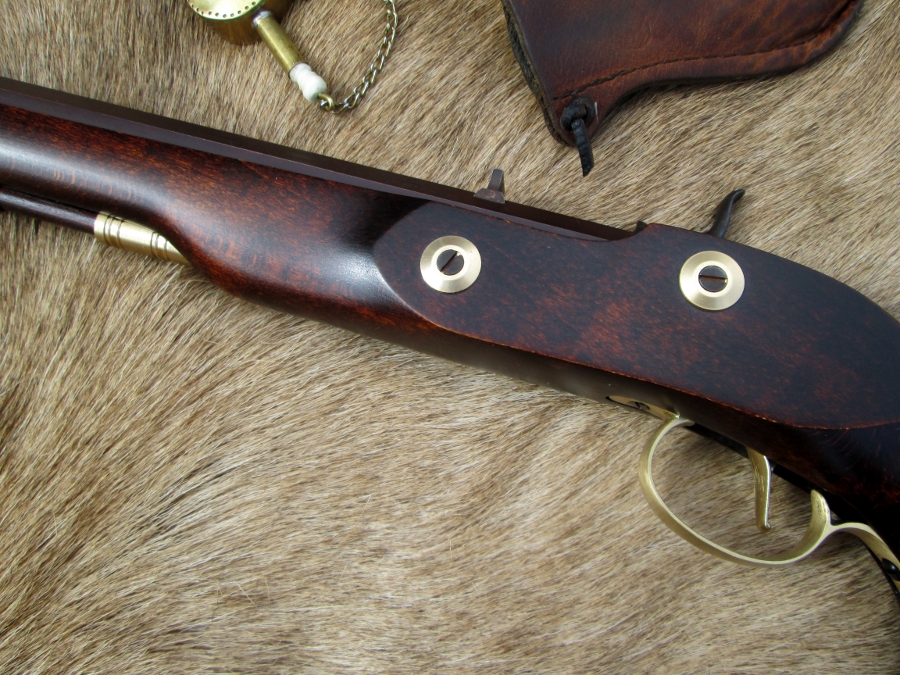
Now with the nose cap in place, I removed the lock from the package and placed it into the stock. No fit! Typical with Traditions kits, they leave you with a little inletting in order for the lock to drop into place. This is easily done my placing the forward section of the lock into the stock and then tracing around the rear of the lock and staying well inside of the marked line.
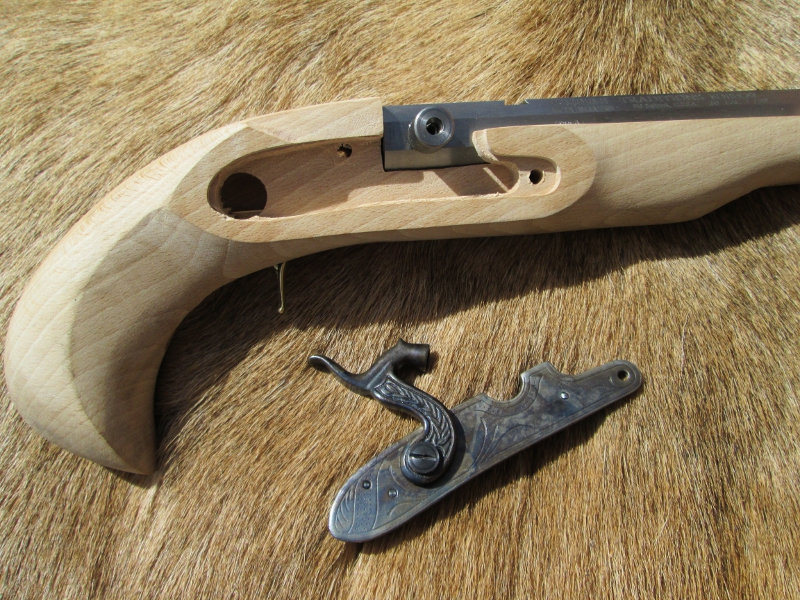
After, Note: This is not the final job as I took more time to clean up the inletting and get it nicely shaped.
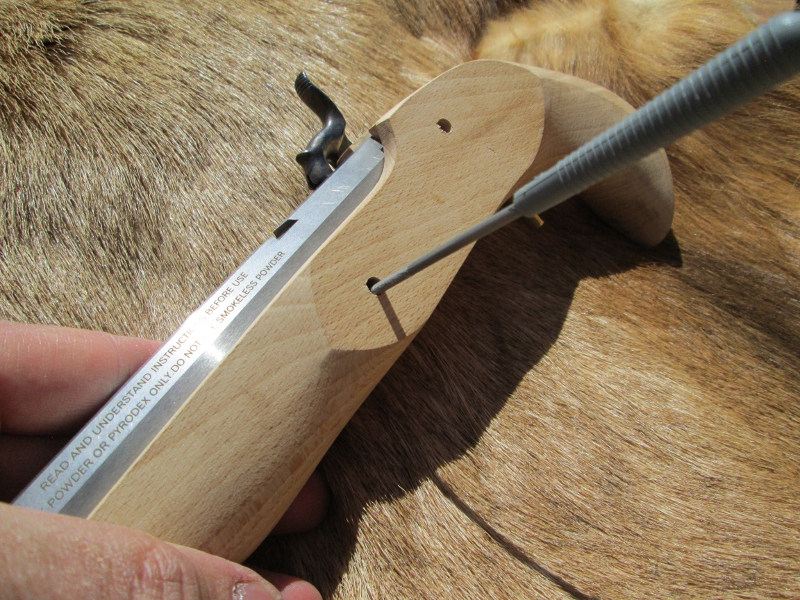
Moving onto the lock screws, I almost made my first mistake by stripping out the first screw! I noticed the screw was going in at an angle, so I had to correct some minor off setting with a round file and make a little more room so that screw could correctly go through the stock and into the lock, straight, rather than at an angle. Note: This is actually mentioned in the instructions guide Traditions sends with each kit gun. Use a round file or drill bit to enlarge the hole to permit alignment.
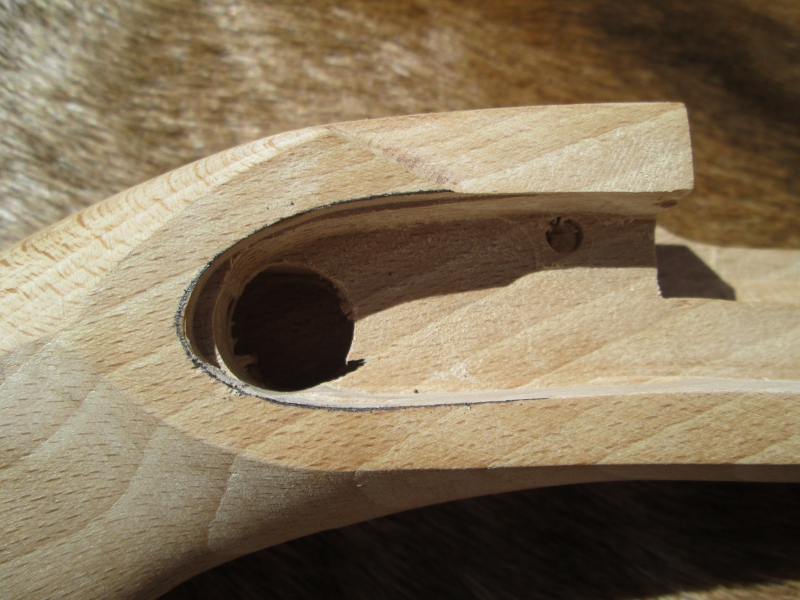
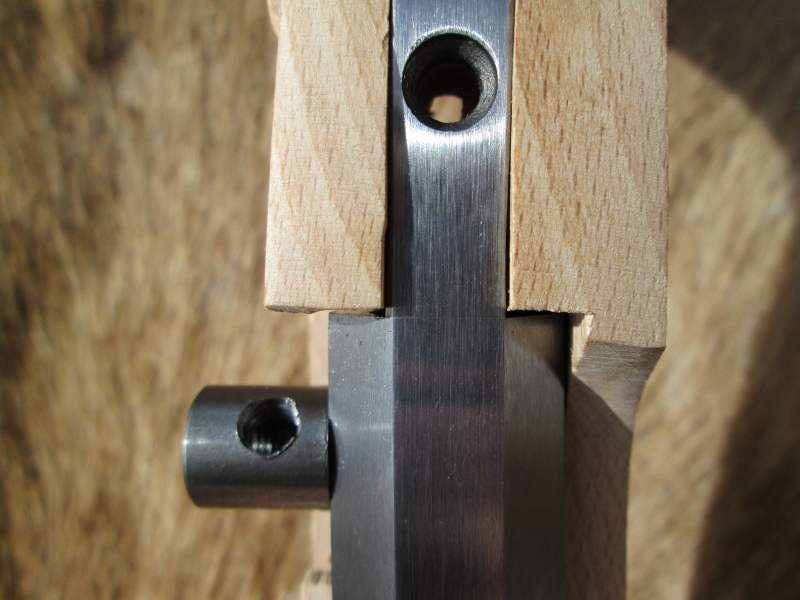
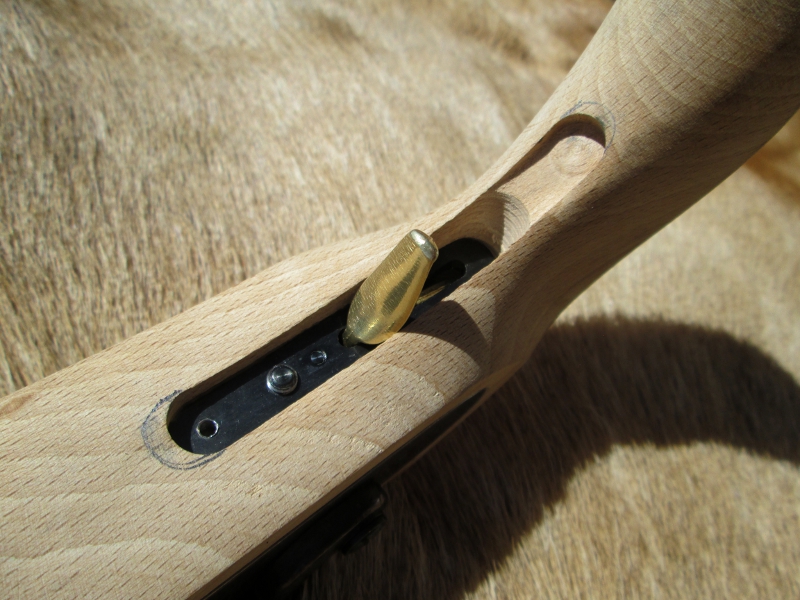
Inside of the barrel inletting, You'll need to file or sand some milling marks out. Note the small square hole just below the tang inletting. The breech plug is the tang, so they had to make room for everything to fit into place. I had to open this square hole up a bit so the barrel would properly push into place.
Now don't scared off by the slight gap! This looks huge in the picture, but in reality, is less than .016" which will be perfect for when I bed the tang and trigger.
Note: Tang hole may need to be drilled out larger or a round file used to enlarge the hole for proper screw alignment. Tang metal may also need filing for proper wood to metal fit.
Also behind the barrel/tang, there is less than .008" of a gap, again, perfect for the right amount of bedding. I do like to bed my rifles as I tire of the metal eating into the wood during heavy shooting events. The tang screw just loosens up, accuracy goes to hell and then you start having to tighten the tang screw more and more until one day, your rifle or pistol fires off due to the sear hitting the top of the trigger due to so much wood wear.
Getting back to work, I was able to finish the stock completely and got it stained! Now the stock from the factory comes super clean, I use both 100 grit to take the wood down where it was needed, and 150 grit to finish everything off.
However, Before I get to far ahead of myself. Last Night I removed the barrel and used a little JB Weld original formula, and bedded behind the barrel and the tang. I really feel good knowing that it's bedded and any little mis alignments are now filled and level.
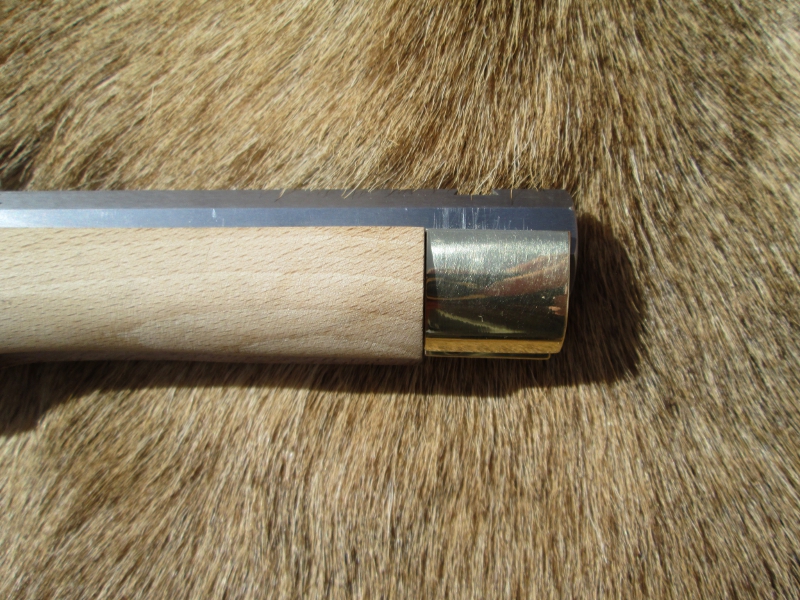
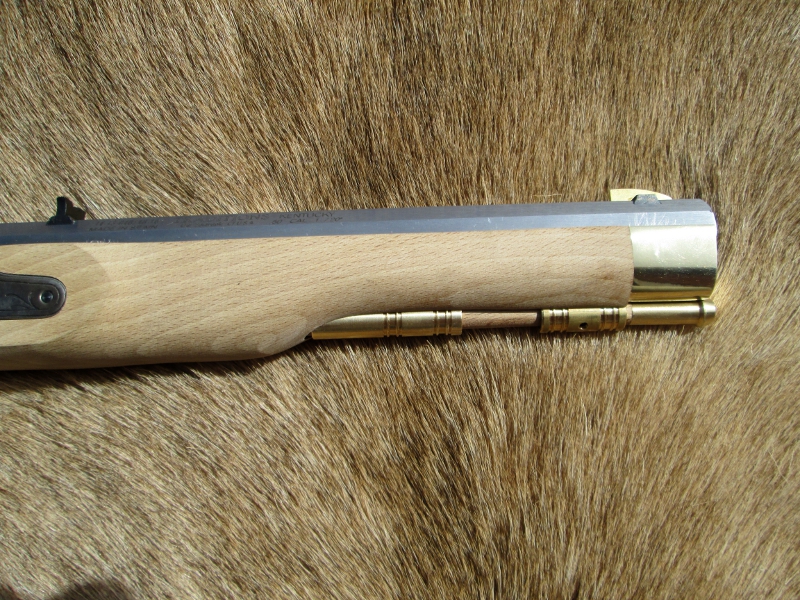
When I went to test fit the rear ramrod entry pipe ( ramrod thimble ) it was very tight and I worried about splitting the wood. It was also very long and would be impossible to remove if you needed to do so, sometime down the road. I cut the rear entry pipe down shorter to where just a 1/4" went into the stock and everything was perfect and I could remove it easily if needed.
I also was able to remove enough wood by the trigger guard so it was flush with the metal. I did notice that the tang screw was quite a bit longer and pushed into the trigger guard, I will fix this before I get to browning the barrel and other parts.
Now with the stock sanded down perfectly, all the lines clean and crisp, I used a soft clean rag and started off with Birchwood Casey Walnut and applied Three coats, before hanging it up to dry and then used 2 coats of Birchwood Casey Rusty Walnut.
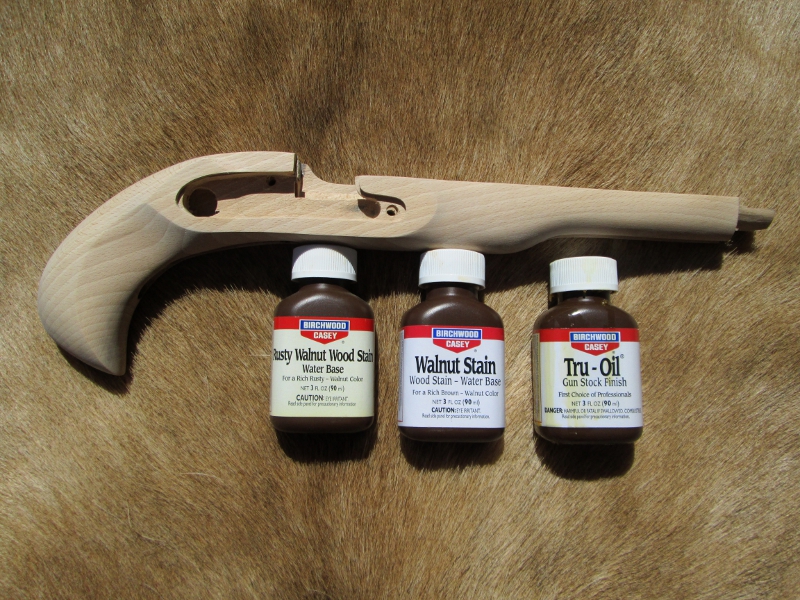
After the stain had dried, I used a green scotch brite buffing pad and knocked down the whiskers for a clean, smooth surface. Once I inspected for any serious scratches I may have missed, I then got my can of Boiled Linseed Oil and gave the stock a heavy rub down, inside and out and allowed the stock to soak that up. I actually gave it 5 good heavy coats of BLO and it sucked up every drop.
Next I took my Birchwood Casey Truoil and mixed it into a small separate container that had BLO, and mixed them together. You can get more work time with Truoil when you dilute it with boiled linseed oil, plus it seems to pull deeper into the wood, rather than build up right away.
I did 3 coats of this, before hanging it up to dry for the night.
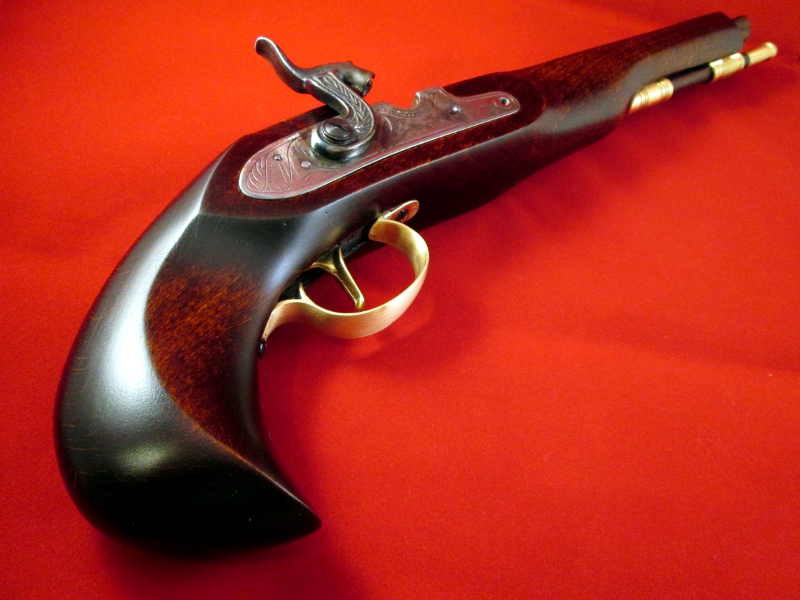
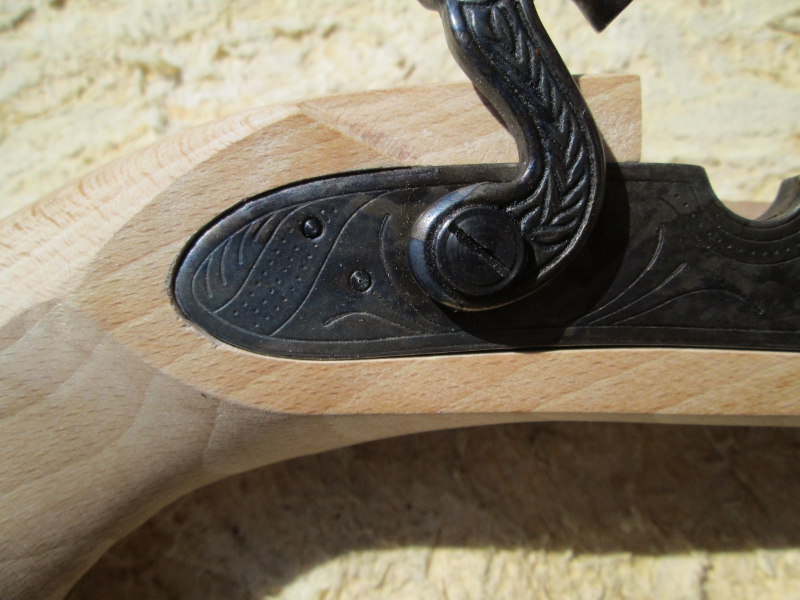
After the stock was finished, I then took the lock apart which was a real chore! That hammer is set onto the tumbler very tight and I used a small punch and placed the lock between two 2x4's and gently tapped the tumbler out of the hammer.
Once removed, I used Birchwood Casey blue & rust remover to clean the lock, then degreased it and used Plum Brown solution to brown the lock plate and hammer. This I simply used a propane torch and heated the hammer and lock plate until a drop of water sizzled, then wiped the solution on with a wet cotton towel. I did 3 coats for a nice looking finish.
Also while browning the lock, I took the time to prep all the blued screws and brown those as well so everything matched.
A light coating the lock internals after browning and re-assembly, I used a very thin coating of Frontier's Anti-Rust & Patch Lube on the internals of the lock.
This kit pistol was a great project and easy to put together. There are areas that I could certainly improve on, but as with everything, Practice makes perfect! I can live with the small mistakes I made along the way, simply from not having any experience with these pistol kits!
The kit went together with minimal tools needed other than a couple round files and of course our typical every day flat file for working on metal parts and shaping the fore end of the stock at the nose cap. With patience and a good sanding block, you could actually assemble the kit without the flat file, but you WILL need a couple small round files to properly align lock screw holes and the nose cap screw holes.
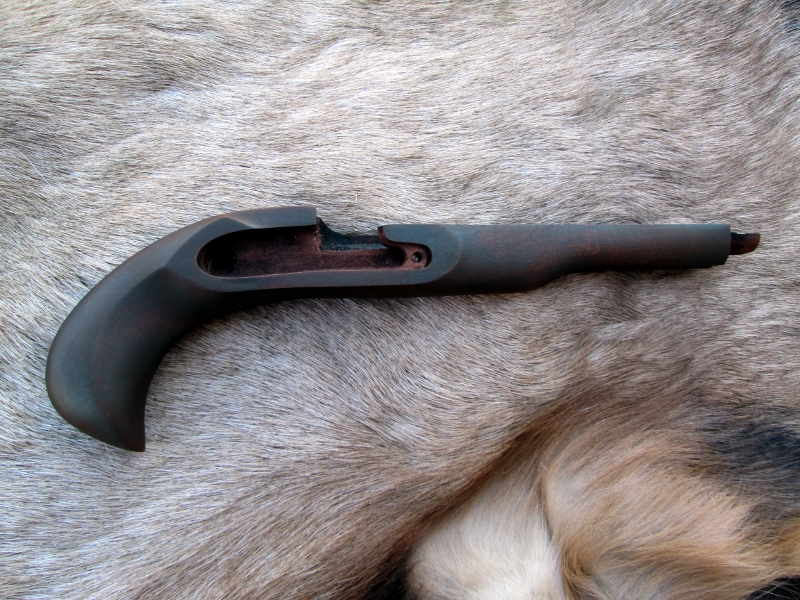
Please take note of the finish on the stock. On my St.Louis Hawken I did not put the Truoil on heavily to where it looked like it was dipped in glass. I normally do high gloss finishes with Truoil, but because this my main hunting set up, I wanted something with more "feel" to it and a finish that was less slippery. This stock still has some grain to it when I touch it, it's not slippery.
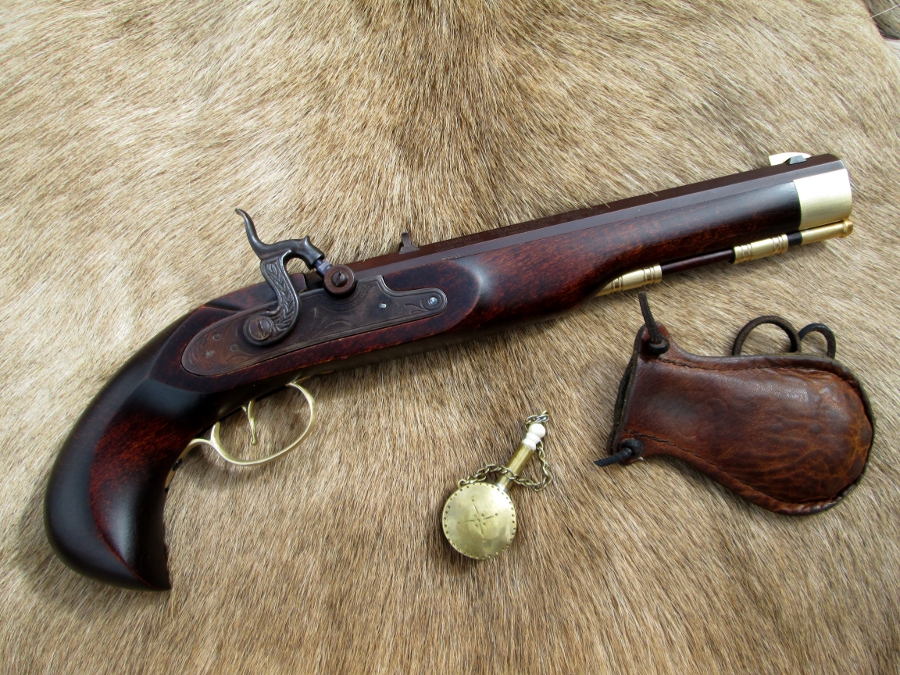
The barrel was browned with Laurel Mountain Forge browning solution. This matched up great with the Birchwood Casey Plum Brown solution.
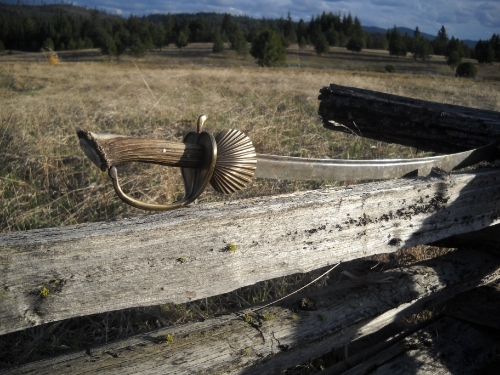
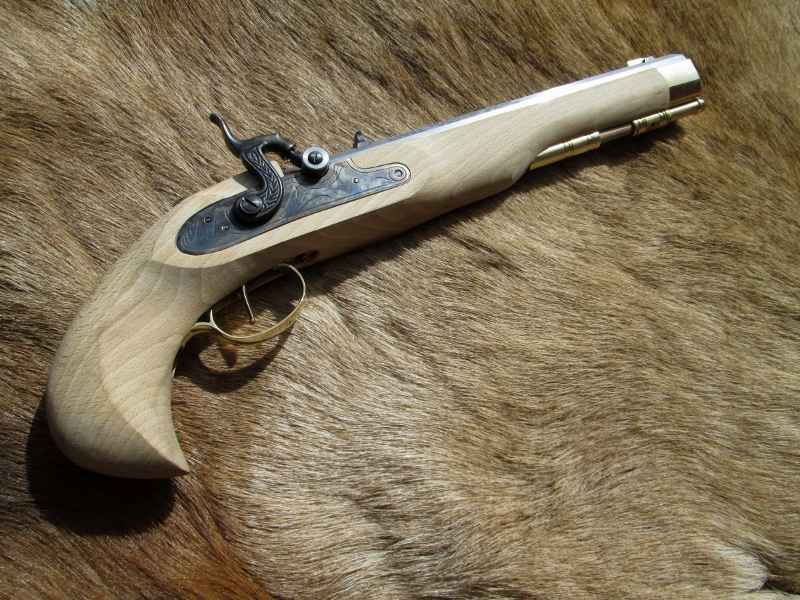
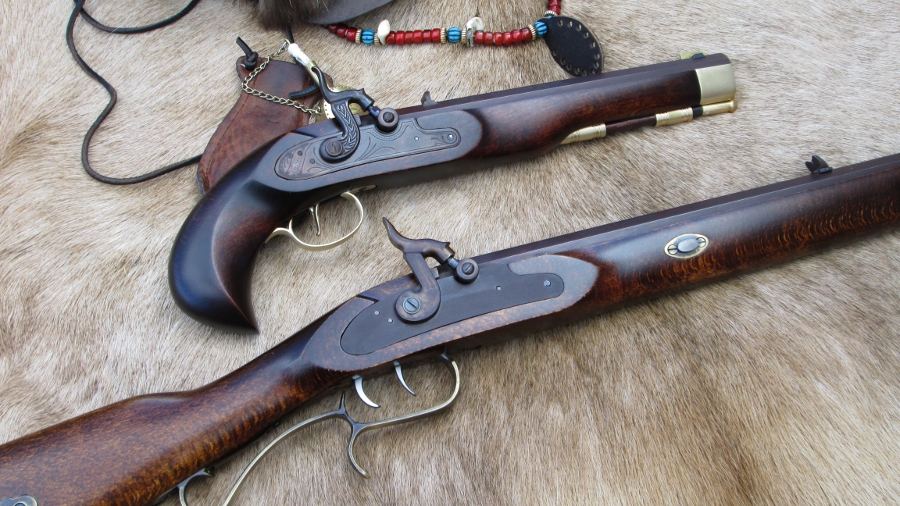
The birds head grip is really an attractive addition to this pistol!

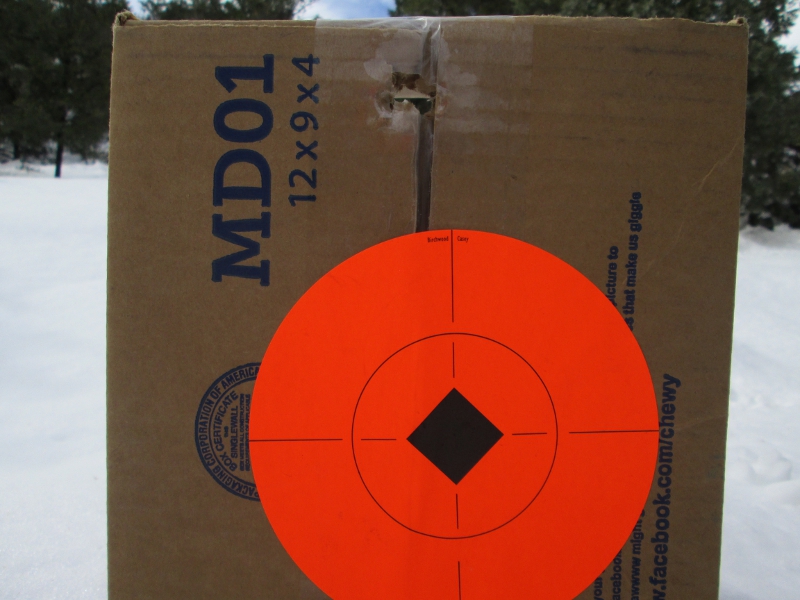
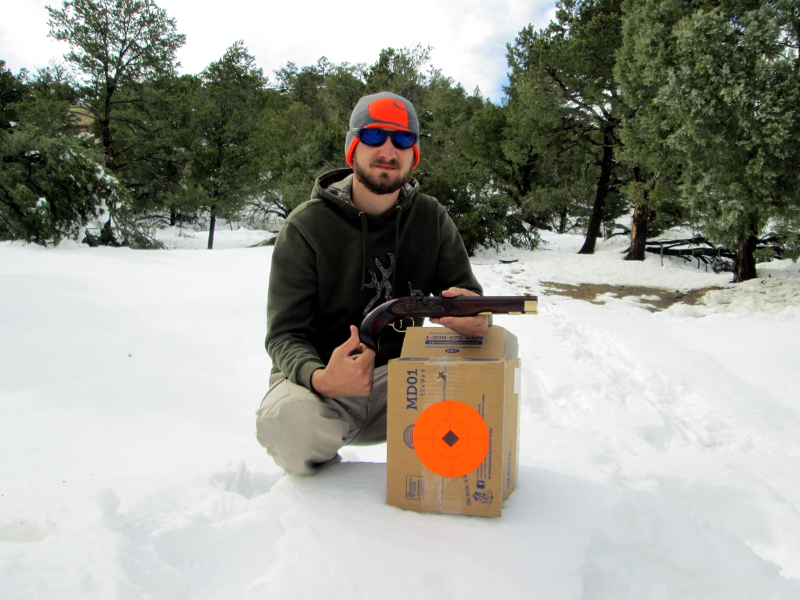
After shooting the pistol a few times, I feel I might the right choice with the Kentucky pistol kit. At first it felt weird, like it would pop out of your hand under recoil, but my thinking was very incorrect. The Kentucky may feel small if you have big hands, but with a little time and handling, this is a very comfortable pistol to shoot and carry tucked into your wide leather belt.
Now, when Floyd and I go out to check traps, we'll be well equipped for both loose, and trapped hogs!
The Traditions Kentucky & Traditions St.Louis Hawken make for a great couple come hunting season!
 ig:
ig: