TC Hawken old kit rebuild and refinish

Modern Muzzleloading Forum

Help Support Modern Muzzleloading Forum:

This site may earn a commission from merchant affiliate links, including eBay, Amazon, and others.

RhinoDave

Well-Known Member
*
Joined
Jan 25, 2017
Messages
170
Reaction score
29
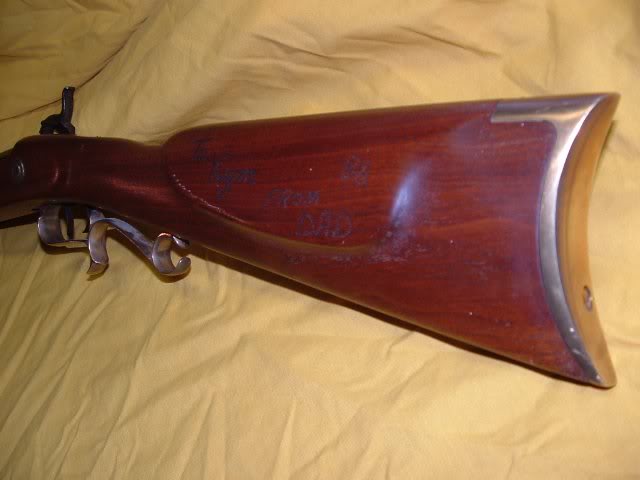
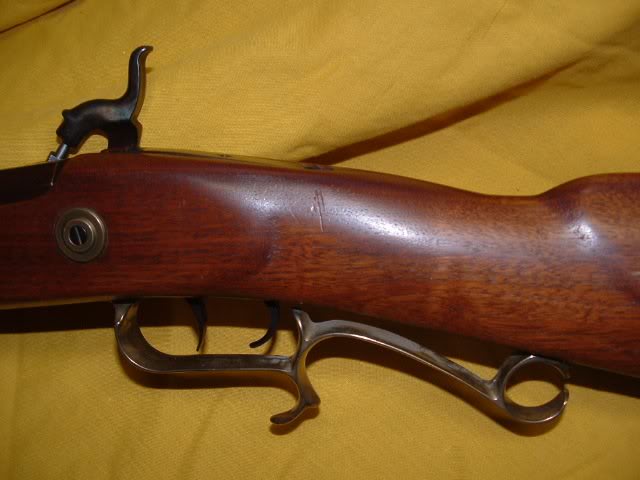
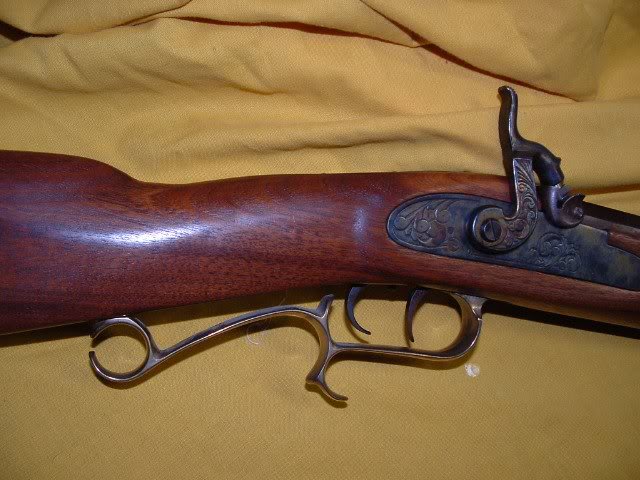
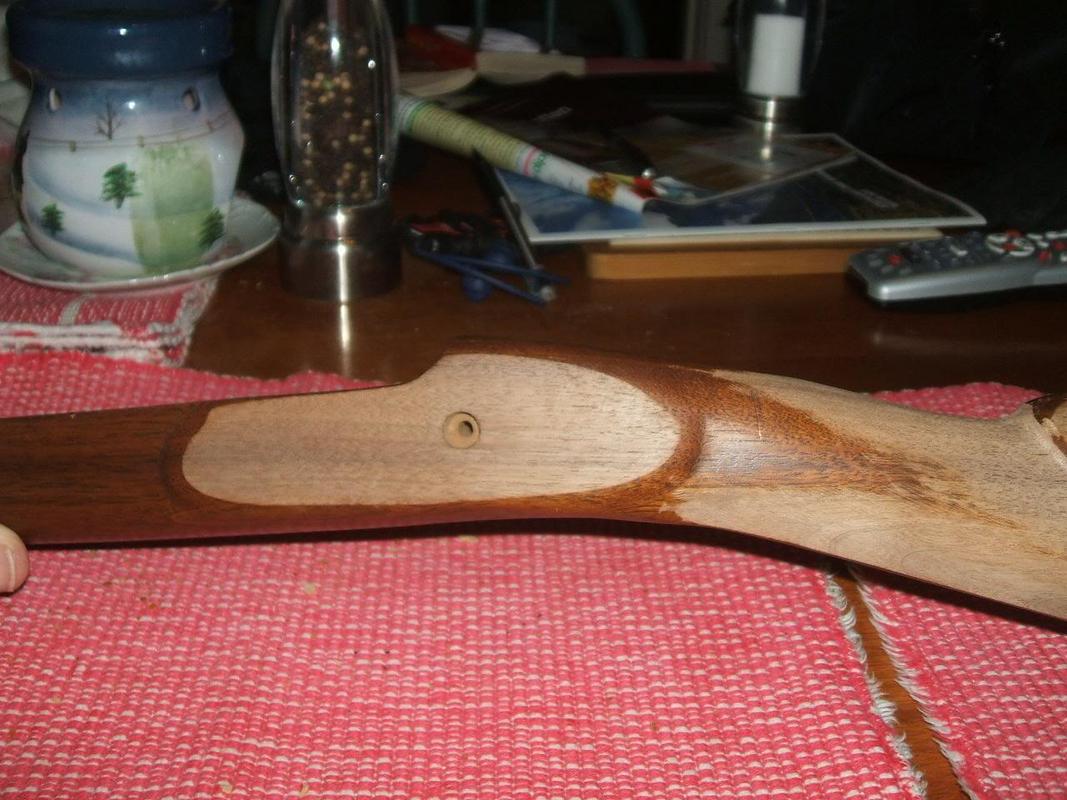
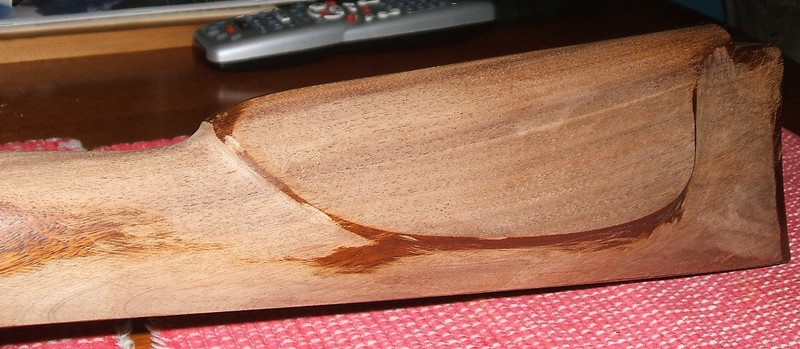
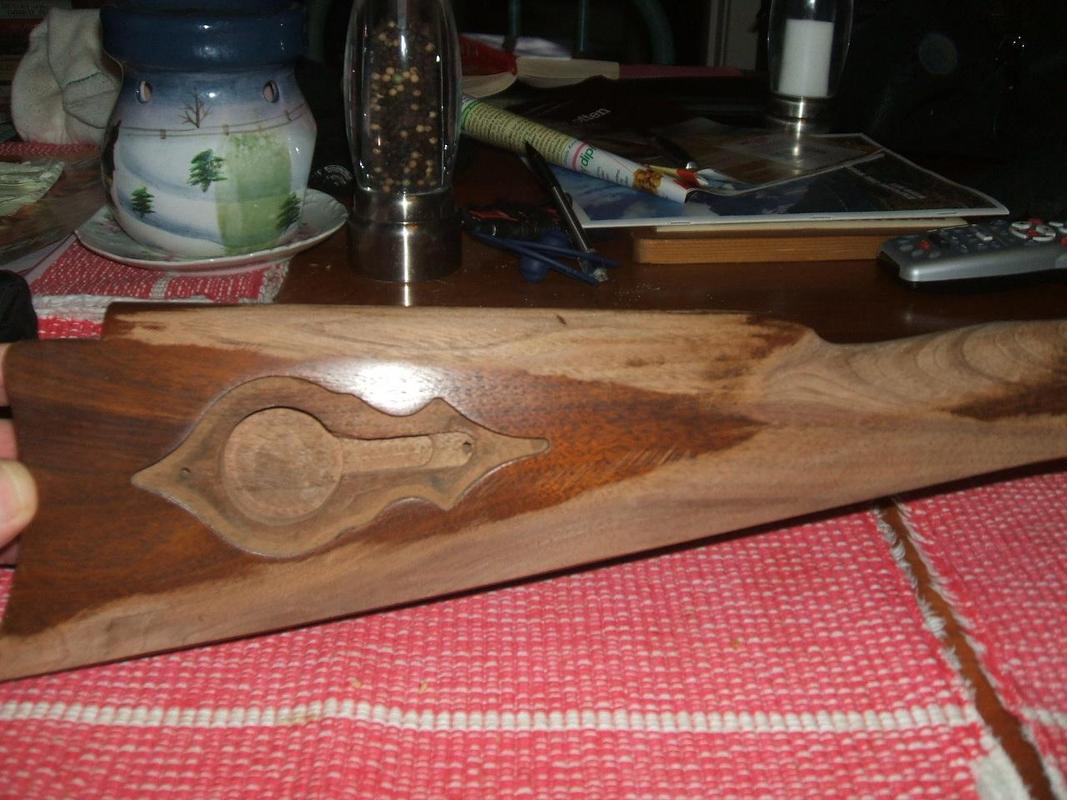
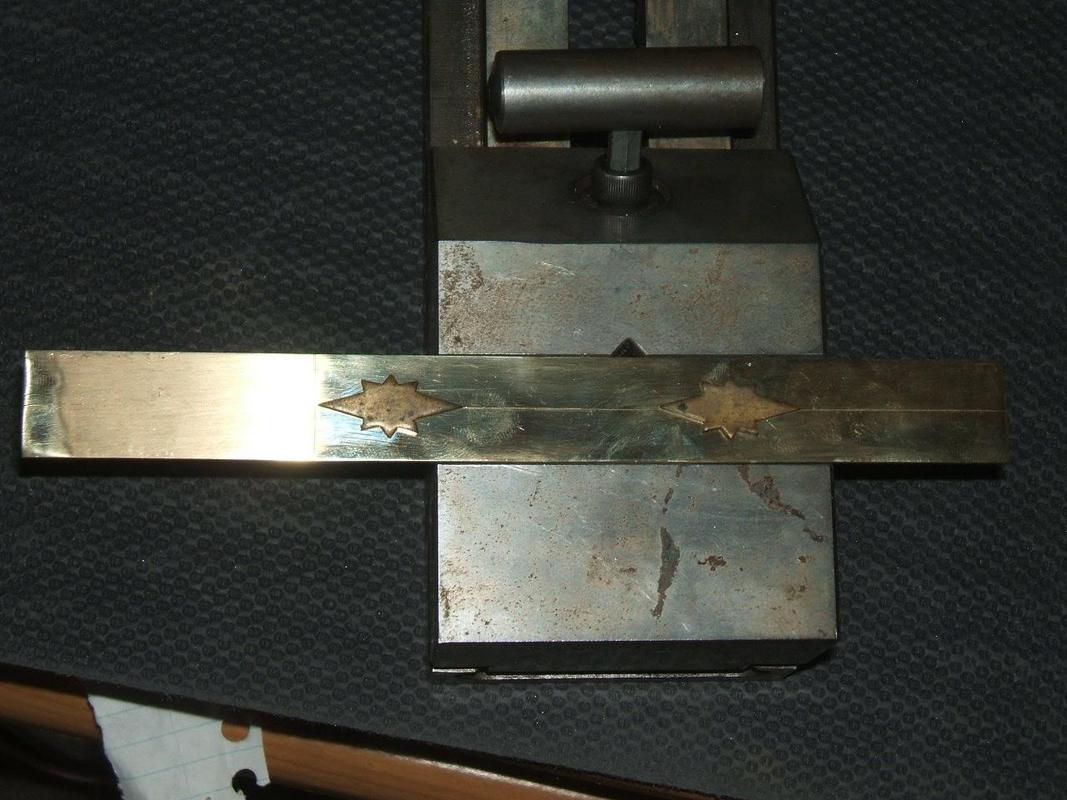
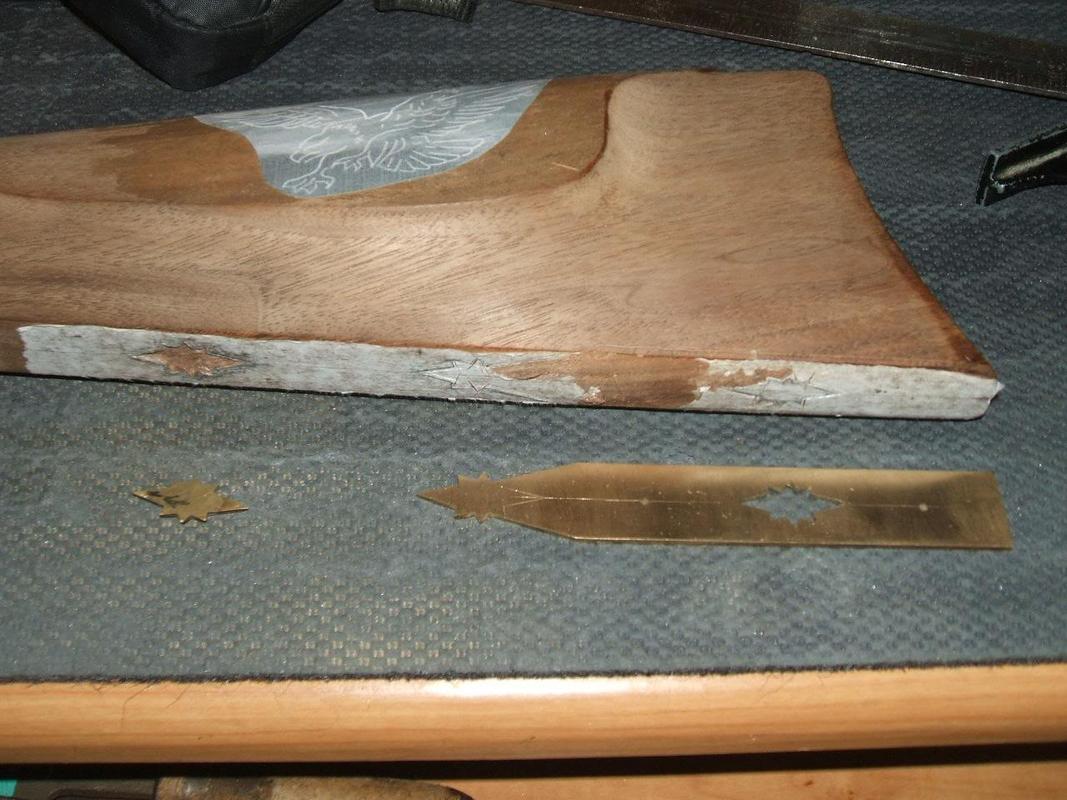
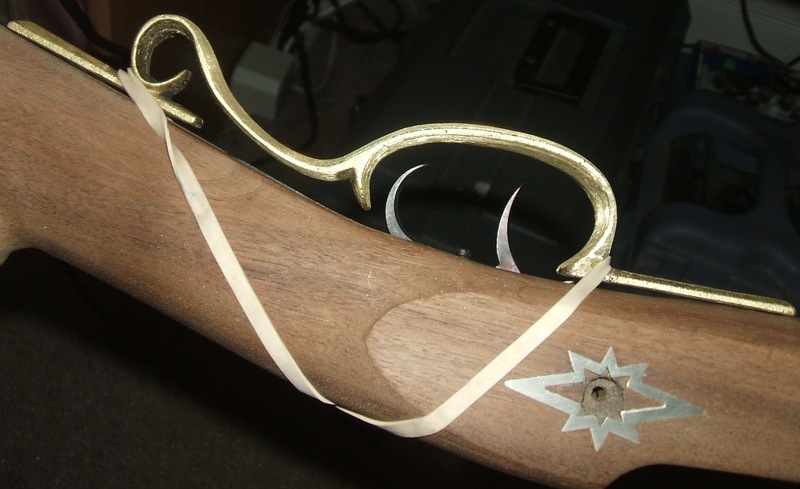
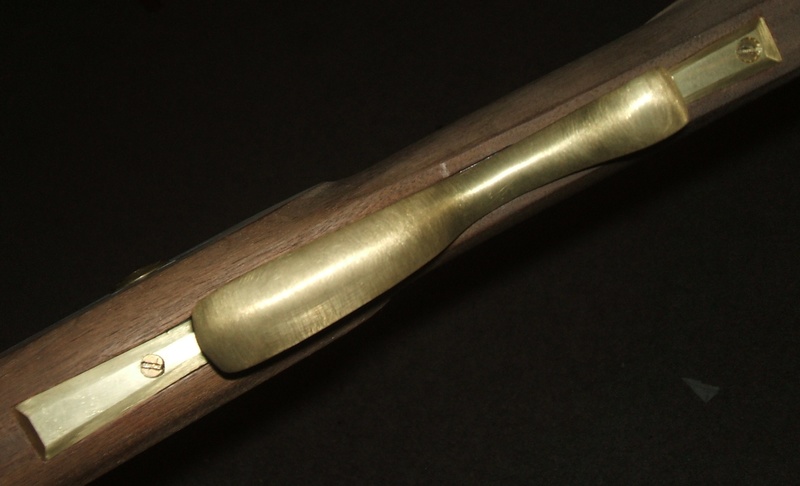
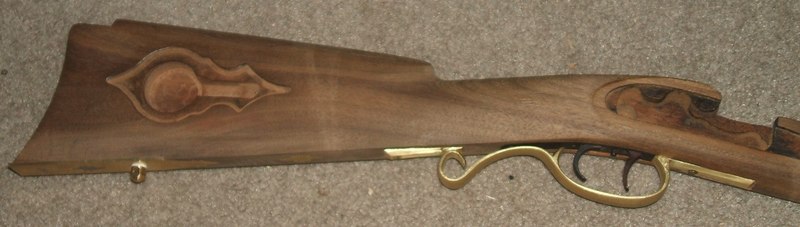
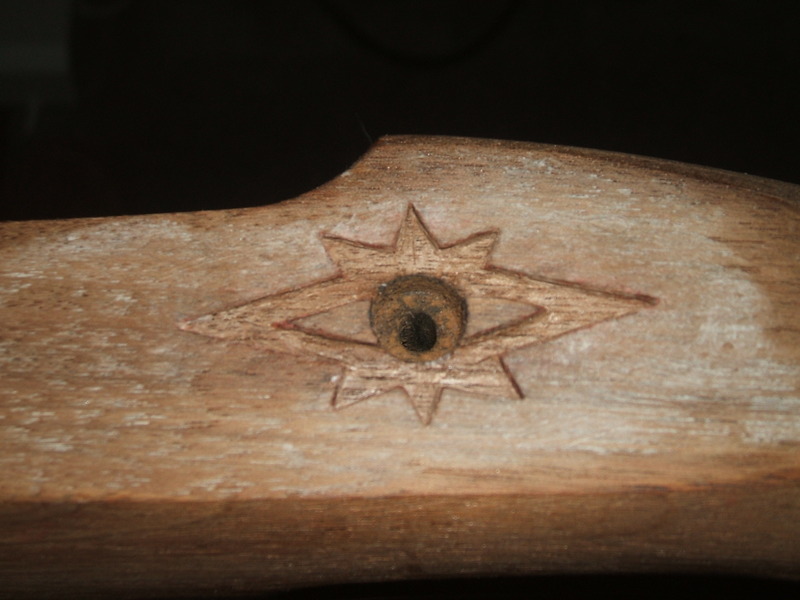
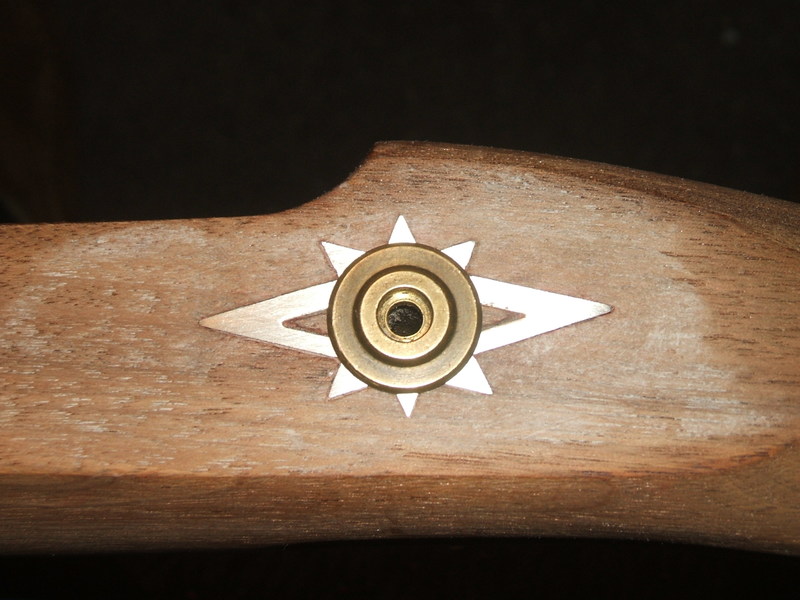
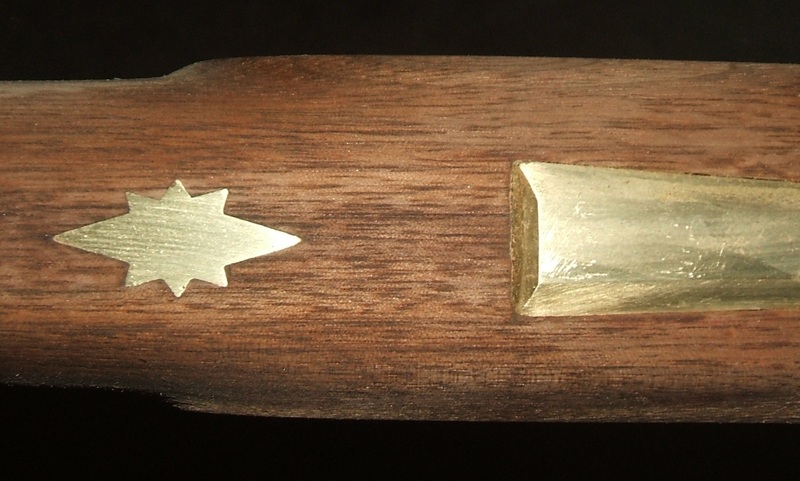
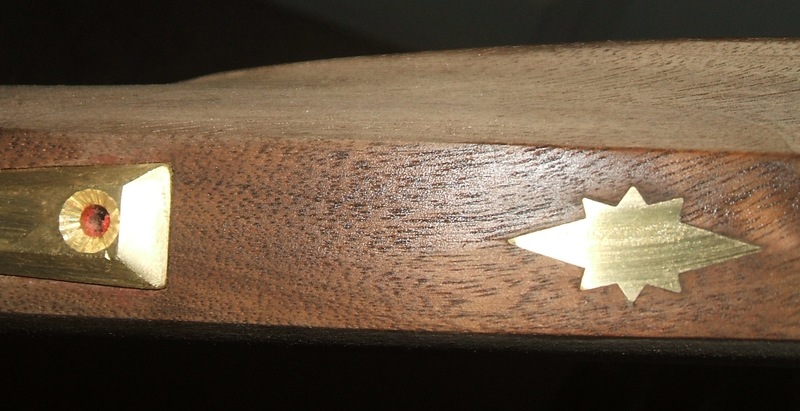
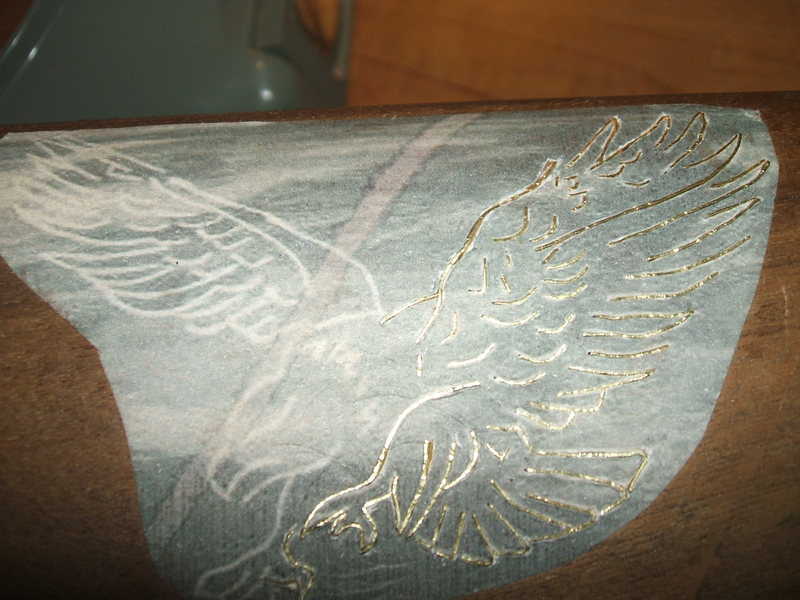
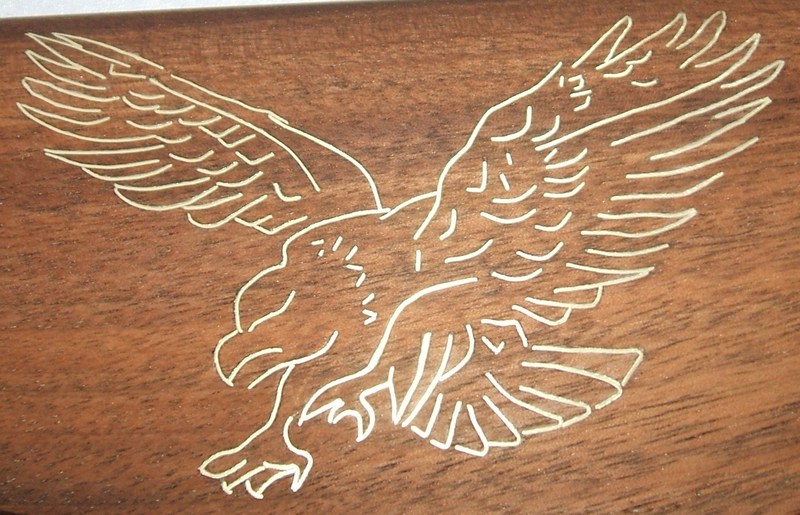
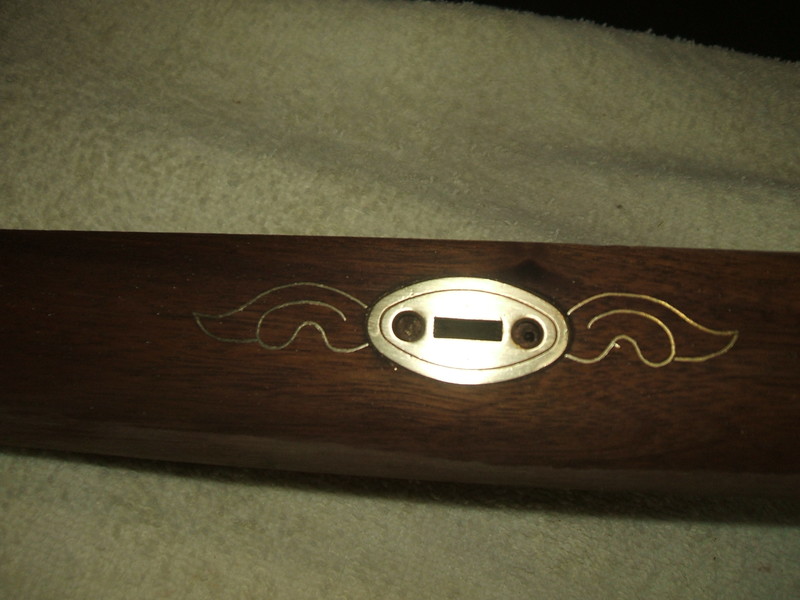
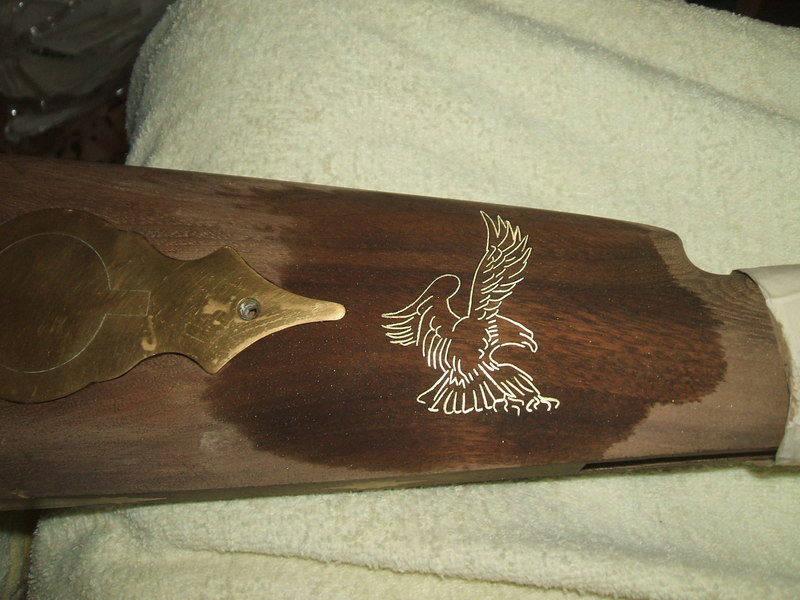
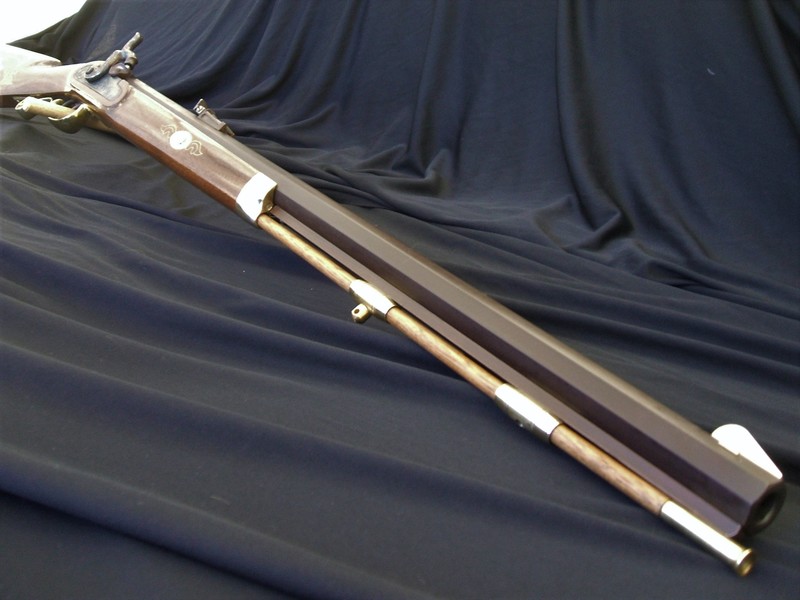
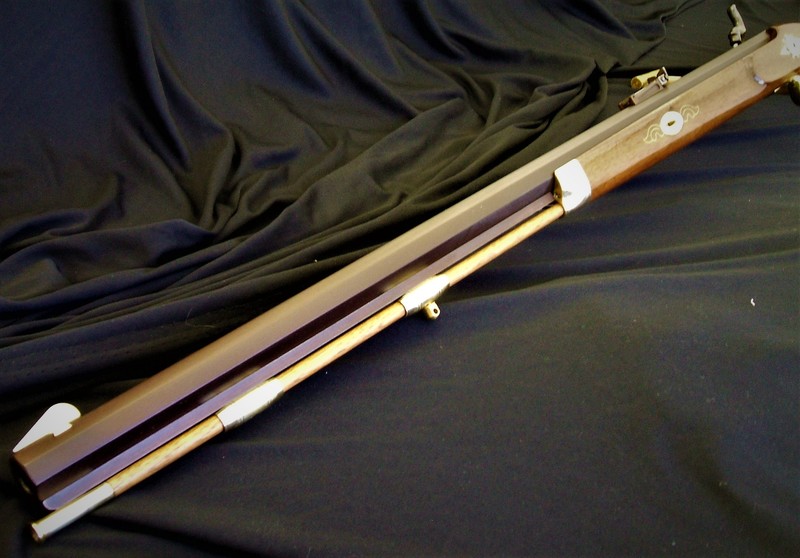
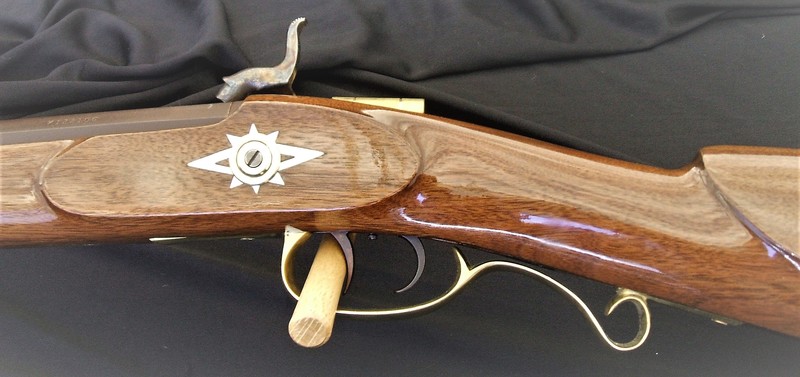
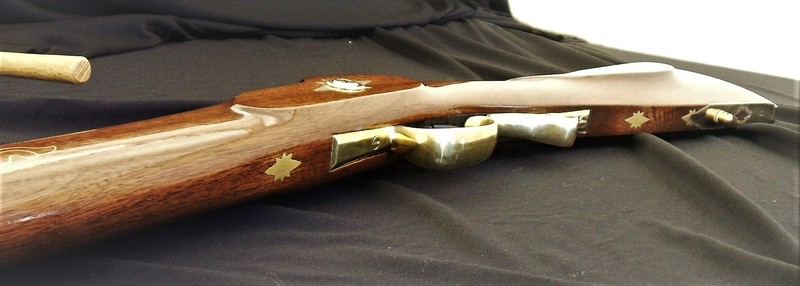
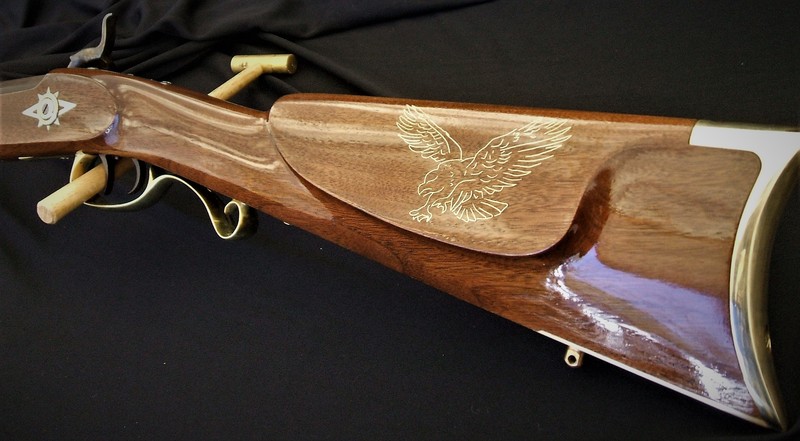
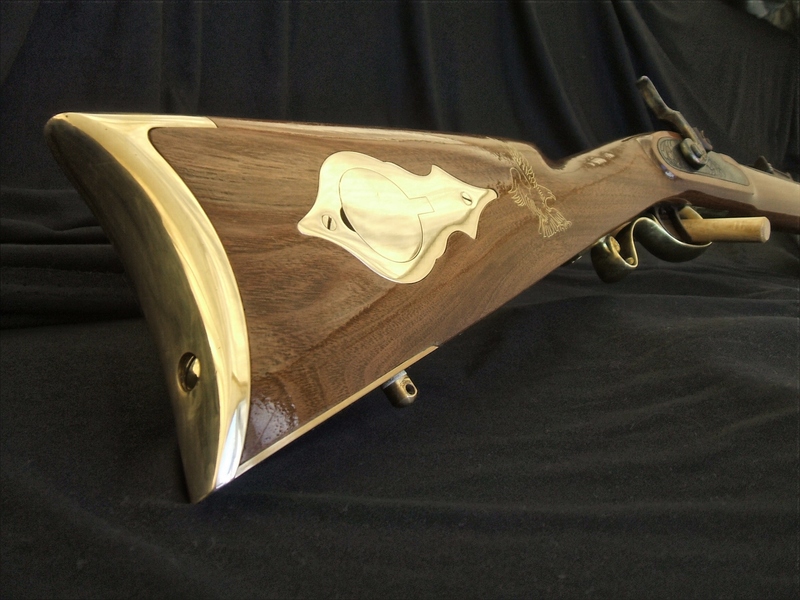
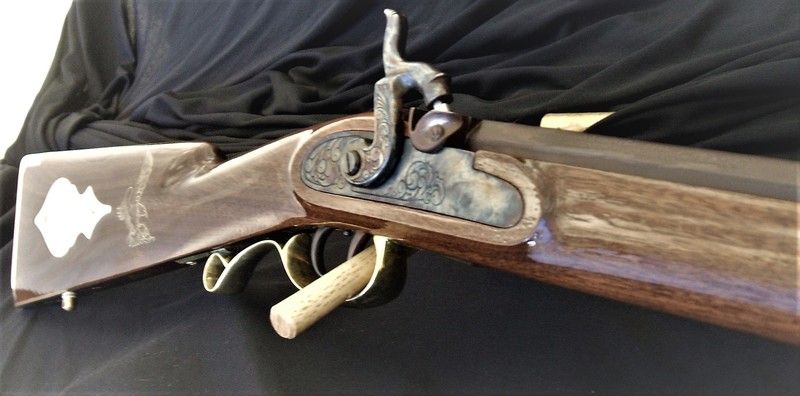
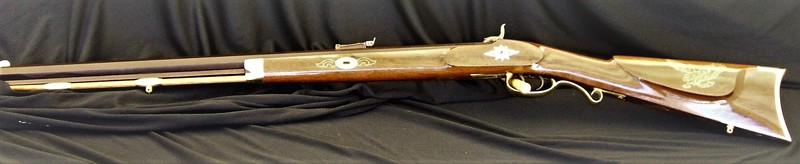
Just checking to see if there is any interest in a step by step with pictures of a second hand Hawken that I stripped down and refinished a few years back. I did this on another forum but with photobucket pictures so it is long gone. The rifle is still one of my favorites to shoot.
 
First a little history. I picked this up pretty cheaply at one of our local gun stores. It is a kit gun that looked like it was finished pretty quickly with a minimum of fitting or finishing. The cheek was engraved with what looks like punched in lettering that changed from cursive to block printing. As is typical with many first time kits all the edges around the lock plates, cheek and comb were sanded round. Here's a few pictures before.
This shows the lettering on the cheek.
Before1.jpg

Next two pictures show the excess amount of wood left on the stock and the rounded lock plate bolt panel. It also shows the stock triggerguard with the extra hook I  dislike.
Before2.jpg

Before3.jpg
 
First before any rework it made a trip to the range after a complete inspection and cleanup. Honestly, I think it was a gift that was thrown in a gun cabinet or closet and left for dead. Other than being pretty dusty, the barrel and bore were in great shape. First step was to completely dismantle it and begin to reshape the stock. This entailed reshaping the lock panels, reducing the cheek to remove all the lettering, reshaping the comb. and general slimming down of the whole rifle. from the foreend cap all the way back to the buttplate.
Lock panels getting reshaped for better definition.
Lockbolt_plate1.jpg

Reducing the size of the cheek. This also helps to reduce cheek slap which is common in this model rifle due to the shallow drop.
2011_0601_Image0003.jpg

Showing the reshaping of the comb and some of the slimming areas before final finish stripping. 
Shaping1.jpg

I didn't get a good picture of the forend wood removal but it was trimming down the sides along the barrel channel and around the bottom curve of the forend. This also included filing down the endcap to make it slimmer and shaped  a little better. After all the reshaping was complete, I used a citrus based stripper to removel what little finish was left on the stock.
 
With the reshaping of the stock complete, it was time to move on to furniture design and dressup. I had two definate things in mind to start. These were to replace the triggerguard with one a little more in the style of a Hawken rifle without the extra finger hook and to add a toeplate. I also had a bunch of small stars and wing inlays in my parts box so I decided on an eagle and stars motif for the rifle. Since Hawken or Plains rifles are normally sort of.....plain, I needed to keep the ornamentation on the subdued side. Because of this I decided to keep the large and visable inlays made of wire and not solid brass. Hopefully, this explains why I ended up doing the things I did. 
First up, the making and installing the toeplate. I ended up making my own so it would match the other stars I had on hand.
Fabricating the toeplate from sheet brass.
Toeplate1.jpg

Finished toeplate and starting the inlay.
Toeplate2.jpg

Toeplate in place with sling stud and screw.
Toeplate4.jpg
 
As mentioned in other posts, I'm not a fan of Dimick style triggerguards. I was lucky enough to find a triggerguard I liked in TOWs catalog. It was large enough for the double triggers and the mounting plates were large enough to cover the stock inlets. It was rough cast so it required quite a bit of finishing before use. 
Rough cast just rubber banded to determine exact position. 
guns_002.jpg

After inletting the guard into the stock.
guns_007.jpg

The toeplate and triggerguard installed.
guns_008.jpg
 
Next up are the star inlays. I had a silver cutout inlay that I decided to put under the lock bolt washer. This would add a little ornamentation to the panel without being too obvious. I also added small stars on the underside of the stock between the toeplate and triggerguard and in front of the trigger guard even with the front of the lock panels.
Cutting in the silver star.
Picture_008.jpg

Finished inlay.
Picture_004.jpg

Star in front of triggerguard.
DSCF1442.jpg

Star behind triggerguard.
DSCF1441.jpg
 
Last but not least are the wire inlays. First added was the eagle on the cheek. After finishing this, I decided to add wings around the barrel tenons just to add a little to the forend. After completing these, I finally decided to add the eagle in front of the patchbox. 
Eagle pattern glued on cheek and some of the wire installed.
DSCF1473.jpg

Wire installed and filed flush with stock.
DSCF1478.jpg

Wings around barrel tenons.
DSCF1491.jpg

Eagle in front of patchbox.
DSCF1490.jpg
 
Holy Molley......  :shock:

Keep those posts coming RhinoDave, I NEED to see how this project turns out!
 
You really do great wire inlays. The stock looks like you almost had to take off half the thickness to get the desired result. 
Beautiful job.
 
You really have some skills!!  Your in-letting and wire work is beautiful.
 
Time to get r done. With all the reshaping and inlays completed, It's time to move on to final finish. Switching to the barrel, I decided on LMF rust browning for the finish. I stripped off the cold blueing and after a little finish sanding., I used about 8 coats of browning solution to achieve the rich dark brown finish I wanted on the barrel. I used the stock brass pipes and the rear sight but replaced the front sight with a larger and thicker one (old eyes). I sanded the entire stock with 240 grit sandpaper and after I was satisfied with the surfaces, I removed the buttplate, triggerguard, patchbox and end cap for buffing and polishing. The stock finish is one coat of water based Mahogany and about 8- 10 coats of hand rubbed Tru oil. I'll add some comments on the finished pictures but please feel free to ask any questions regarding the build. Thank you all that commented on the rebuild and especially the kind words. 
One angle of the browned barrel. For some reason I took no pictures of the barrel refinish.
DSCF1539.jpg

Different angle of the barrel. I also made a new hickory ramrod.
DSCF1545.jpg

This would be a good picture to compare with the 2nd of the before pictures.
DSCF1547.jpg

This one shows how much the cheek height was reduced and the redefined lock bolt panel. 
DSCF1550.jpg

Cheek side  angle.
DSCF1546.jpg

Patchbox side angle.
DSCF1537.jpg

Barrel tenon wings.
DSCF1544_2.jpg

Another patchbox side angle.
DSCF1540.jpg

Full side view.
DSCF1549.jpg
 
beautiful work, congrats on your workmanship.
what did you use for a finish on the stock ?
 
rebs said:
..........
what did you use for a finish on the stock ?
one coat of water based mahogany stain and several coats of Tru Oil.
 

Latest posts

Back
Top