Lyman Great Plains Rifle

Modern Muzzleloading Forum

Help Support Modern Muzzleloading Forum:

This site may earn a commission from merchant affiliate links, including eBay, Amazon, and others.

exMember

Well-Known Member
Joined
May 19, 2008
Messages
15,449
Reaction score
581
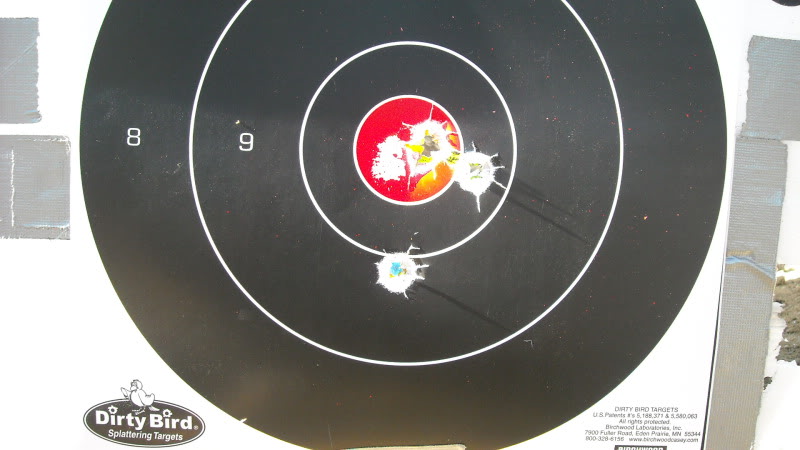
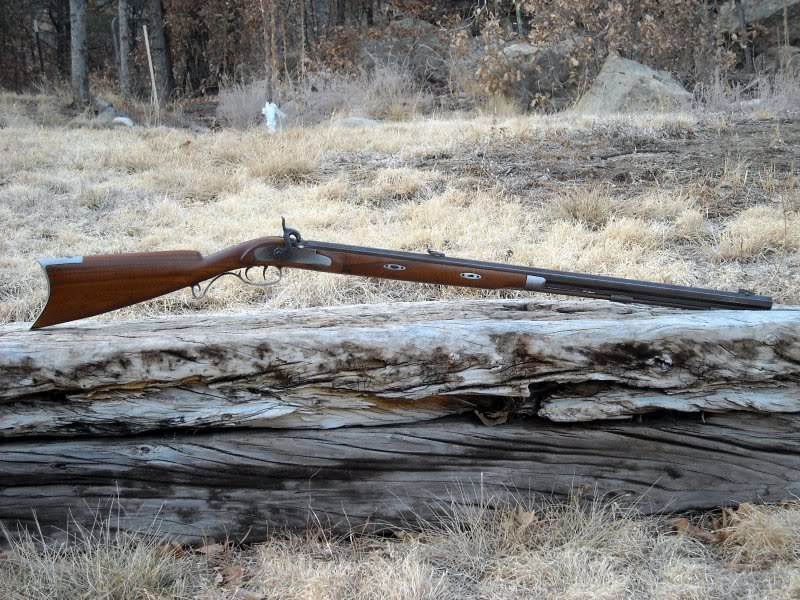
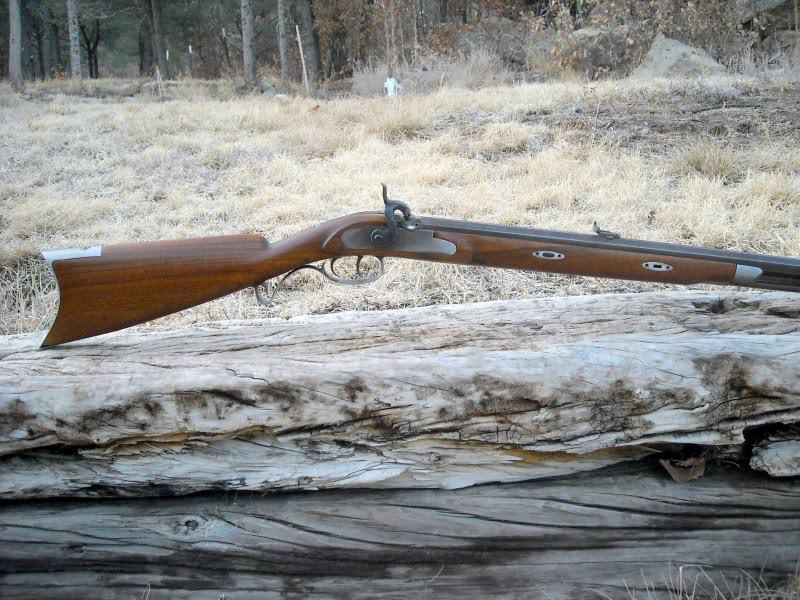
Well after scrubbing the bore clean and then JB pasting it, i took it out to 50 yards with 100gr JSG 3f, .015 patch and .530 round ball. Didn't group well at all.

Was going to call it quits but then remembered i had some thicker .018" pillow tick patches in a little tin than were unlubed. Poured down 110gr JSG 3F, stuck the patch in my mouth and sucked on it, grabbed a ball, laid the patch across the bore and rammed the ball home.

Took 2 shots and they were touching! I didnt even use my lead sled today and i pulled it off LOL.

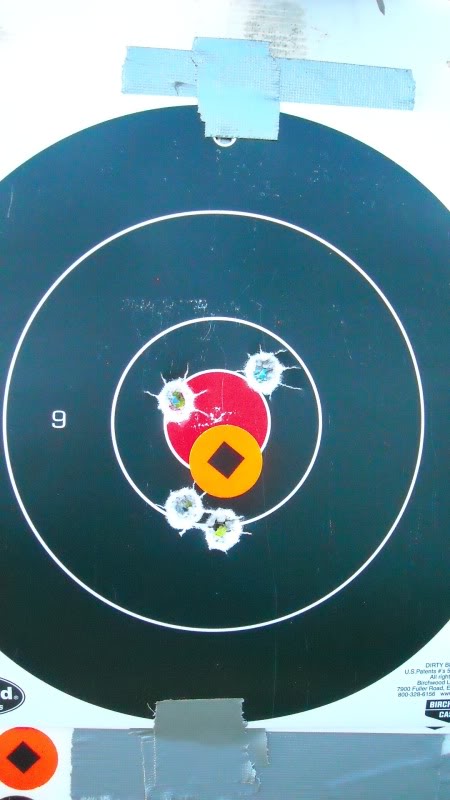
Took 2 more shots with 100gr JSG 3F and the same tight patch combo and ended up with 1 1/4" group.

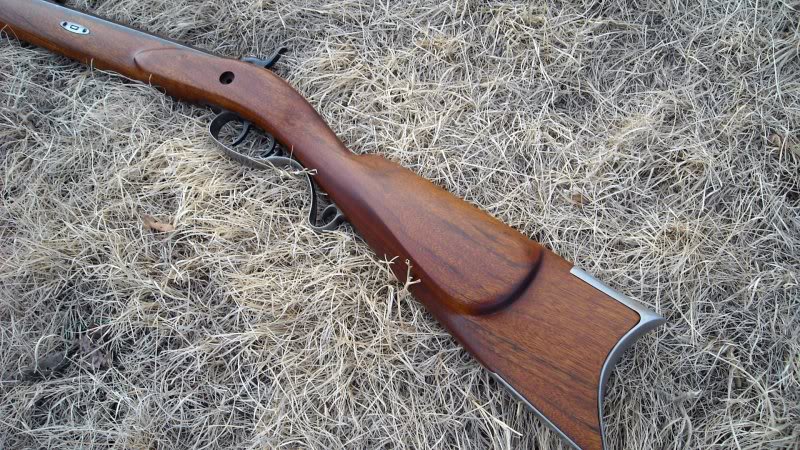
Not bad, but just like the last GPR i had, a powder pig!

DSCN1384.jpg

DSCN1382.jpg


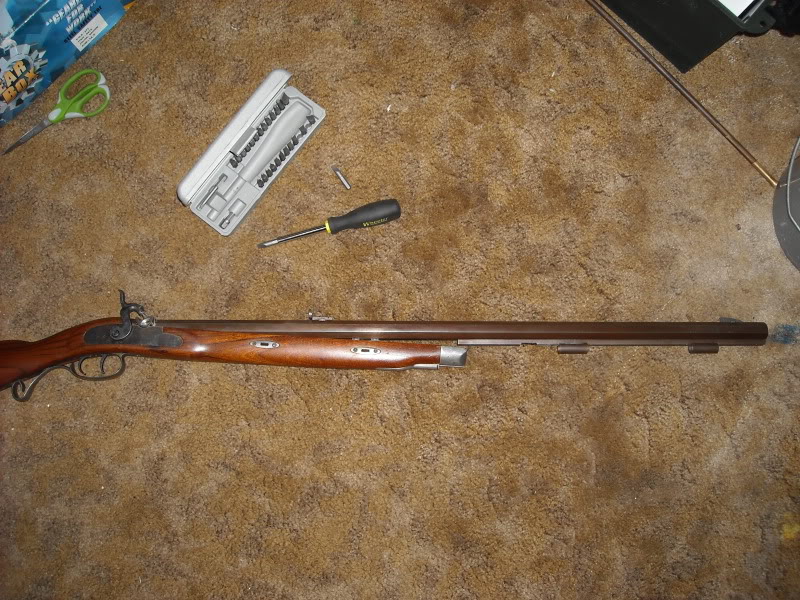
Even got a mold too which looks to be a heck of a lot better quality than my Lee mold.
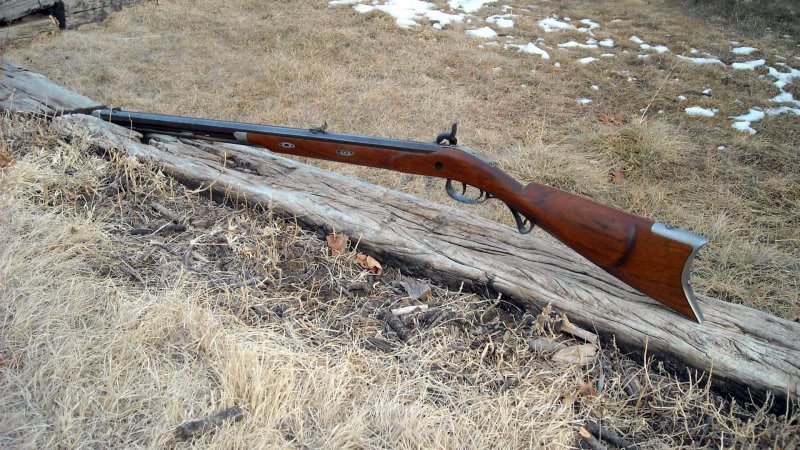
DSCN1385.jpg

DSCN1386.jpg
 
Just some more pics. Pretty wood, have to figure out what stain to use though.
DSCN1398.jpg

DSCN1388.jpg

DSCN1411.jpg

DSCN1401.jpg
 
Nice looking rifle FG.Don't you just love playing with 'em
and bringing everything together.
You planing to refinish the stock?
Who made the mold?
 
Glad you got it. Pillow tickin from Walmart cut at the barrel with olive oil for lube and 90 grains Goex fffg did the trick for me. Hope you enjoy it!
 
Amazing how a different size patch makes a difference.

Nice wood grain. Sounds like it headed to " FG's Custom Shop" :)
 
sqezer said:
FG, very nice looking rifle, I've never had a side lock but am interested in getting one. What direction would you go.
The Lyman GPR is not a bad way to go. It's about as close to an original Hawken as you'll get in a production ML. They're good shooters with the right load too.
 
I like how you take pictures FG, they always seem to show exactly what you intending it to show. That is a sweet gun too.
 
FG..........Maybe you could have a traditional sub forum for those of us that like the old stuff?
 
I had one earlier this year but found that it was better just to combine them. It cleaned up the face of the forum a bit.
 
Well its an update on both the Accuracy and stock redo.

First off, after adding the washer under the tang and now being able to tighten down the screws all the way, i got rid of the springiness and accuracy seems to be excellent so far.

Before the washer was installed. Tang screws tightened down all the way. Major issue with that! I dont mind a wee springiness but that wasnt acceptable!
DSCN1424.jpg


50yards,
I started off with 90gr American pioneer 3f and swabbed the oil out of the bore with a dry patch prior to loading. Common result was my first shot hitting low. Second shot in the black next to the bulls eye and as hard as it is to see, the hole in the center of the bulls eye is actually shots 3 and 4. I am happy as heck with that load. I also used .018 lube pillow ticking with that and the .530 round balls.
DSCN1433.jpg


Next i downed my charge to 70gr American Pioneer 3f and the same patch/ ball combo.

First 2 shots at the bottom, the next 2 shots started to go up a good deal and i think the bore was getting fouled up a bit to much.
DSCN1435.jpg


Now for the stock ive been working slowly. I first cut that Hawken groove right into the thumb area of the stock. I took it a back more than normal as i wanted my thumb to fit perfectly into that area when i bring it to my shoulder. A good anchor to hold it steady.
DSCN1440.jpg


A closer view of the lock, wrist, thumb lock and the rounded bottom of the stock. Its hard to see due to the shadow but i was able to get out a LOT of the GPR's belly look just by sanding and rounding squared off parts of the stock.
DSCN1442.jpg


I thinned the wrist area a great deal due to having plenty of room to remove on the trigger side of the stock. A nice oval shape to the stock. I could go more but i'd have to do some inletting of the rear trigger guard so thats not gonna happen.
Close up.
DSCN1443.jpg


Working on the cheek piece tomorrow, going to thin that out and reshape it so that will be a nice painful, time consuming project alone. After that, move on to the other side of the lock panel and reshape it.

I think i am really going to enjoy this plains rifle after i finish. In the meantime i will continue to swear at it and pop blisters on my fingers from working on it LOL.
 
2 coats hand rubbed oil finish, followed up by one coat hand rubbed truoil and then 2 coats truoil spray on finish. Gave it a day to cure up and then used 0000 steel wool soaked in the oil finish and went and buffed the gloss down to a satin finish. Still have at least 3 or 4 coats of spray on truoil before i call it good and start working on the metal.

It has 5 coats of honey maple stain on the wood. Crappy pics so i will get some outside with it tomorrow.
DSCN1501.jpg

DSCN1507.jpg

DSCN1513.jpg

DSCN1503.jpg
 
Stock looks nice FG. I have to mess with mine too.

Do you find the curved butt plate comfortable?
 
I havent decided what i will do with the barrel just yet. Or the rest of the trim. I figure to get some bluing and browning supplies and test things.

I actually do enjoy the curves buttplate on this rifle. It fits my shoulder really well and holds in place solid. A very comfortable rifle to hold IMO.
 
Nice color! I'll bet it's hard to put the thing down now that you've dug into the project.
 

Latest posts

Back
Top